
How to design a wounded lion.
In this example I have tried here to make wounded lion by the help of the photoshop, you can also make it by following this example so let's try.
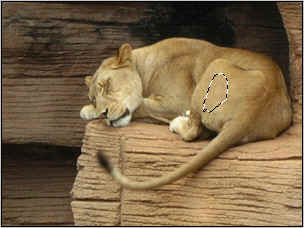
Open a Picture: First open a picture, which you want to modify. I have captured a lion picture.

Selection: Select some area to show wounded effect, go to Polygonal Lasso Tool (L key) and make selection as I have done here.
Color: Choose "BC0129" color and fill by the Paint bucket tool (G key) in the selection.

Add Noise: Go to Filter Menu > Noise > Add Noise with the same settings.

Drop Shadow: Go to Layer Menu > Layer Style > apply Drop shadow.

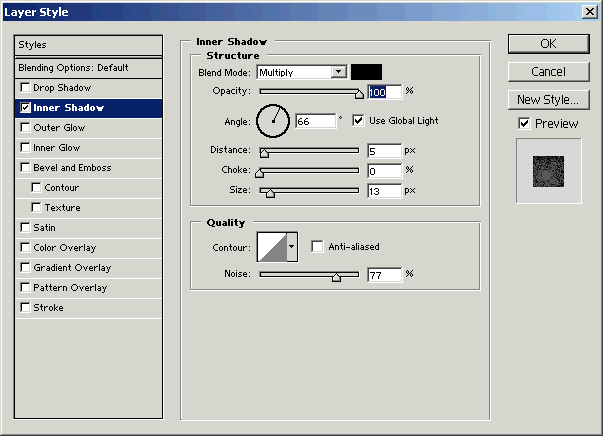
Inner Shadow: Go to Layer Menu > Layer Style > apply Inner Shadow.
Outer Glow: Go to Layer Menu > Layer Style > apply Outer Glow.

Inner Glow: Go to Layer Menu > Layer Style > apply Inner Glow.

Stroke: Go to Layer Menu > Layer Style > apply Stroke


