
In this tutorial we will teach you to install the OpenJDK 8 in Ubuntu 18.04.

How to install OpenJDK 8 in Ubuntu 16.04/18.04?
In this tutorial we are going to guide you steps by step for installing the OpenJDK 8 on Ubuntu 18.04 operating system. The steps given here will apply to other versions of Ubuntu operating system including Ubuntu 16.04, Ubuntu 18.04 and Ubuntu 19.04. So, if you any version of Ubuntu operating system you can follow these steps to install OpenJDK 8 on your system.
You should have direct internet access on your computer because the apt installer will connect to online repository to download the required packages and then install on your Ubuntu Operating system.
OpenJDK is very popular and there is no restriction on the use of this distribution of JDK. You can use the apt-get installer on Ubuntu operating system to install OpenJDK easily.
Steps to install OpenJDK 8 in Ubuntu 18.04
Let's follow the step by step process to install OpenJDK on Ubuntu 18.04 operating system.
Step 1: Update your system
Run the following command to update your system.
sudo apt-get update
Above command will update your system with the information about the latest updates available for Ubuntu 18.04 operating system. Here is the output of the command:
deepak@deepak-VirtualBox:~$ sudo apt-get update
[sudo] password for deepak:
Hit:1 http://in.archive.ubuntu.com/ubuntu bionic InRelease
Get:2 http://in.archive.ubuntu.com/ubuntu bionic-updates InRelease [88.7 kB]
Get:3 http://in.archive.ubuntu.com/ubuntu bionic-backports InRelease [74.6 kB]
Get:4 http://security.ubuntu.com/ubuntu bionic-security InRelease [88.7 kB]
Get:5 http://in.archive.ubuntu.com/ubuntu bionic-updates/main amd64 DEP-11 Metadata [301 kB]
Get:6 http://in.archive.ubuntu.com/ubuntu bionic-updates/universe amd64 DEP-11 Metadata [273 kB]
Get:7 http://in.archive.ubuntu.com/ubuntu bionic-updates/multiverse amd64 DEP-11 Metadata [2,468 B]
Get:8 http://in.archive.ubuntu.com/ubuntu bionic-backports/universe amd64 DEP-11 Metadata [7,968 B]
Get:9 http://security.ubuntu.com/ubuntu bionic-security/main amd64 DEP-11 Metadata [38.7 kB]
Get:10 http://security.ubuntu.com/ubuntu bionic-security/universe amd64 DEP-11 Metadata [42.0 kB]
Get:11 http://security.ubuntu.com/ubuntu bionic-security/multiverse amd64 DEP-11 Metadata [2,464 B]
Fetched 920 kB in 2s (486 kB/s)
Reading package lists... Done
Now we will go to the next step for installing the OpenJDK 8.
Step 2: Run the command to install OpenJDK 8
To install the OpenJDK 8 on your system you can run the following apt-get install command:
sudo apt install openjdk-8-jdk
Here is the screen shot of the process:
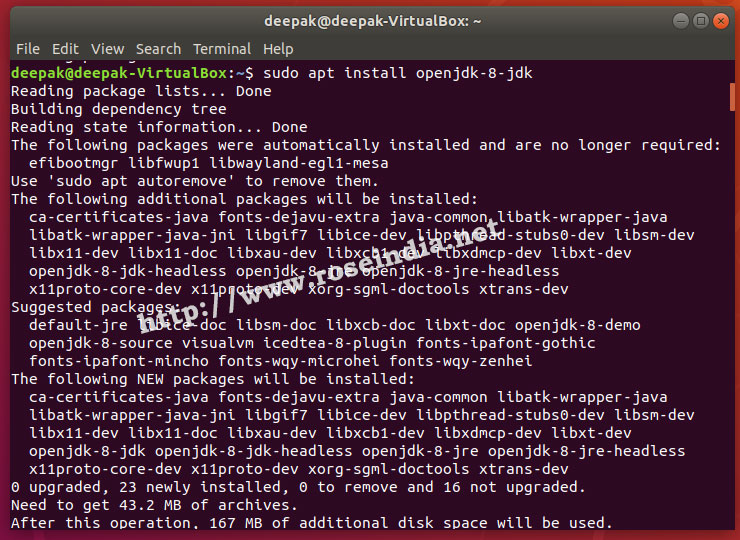
Above step installs OpenJDK 8 on your Ubuntu 18.04 operating system. Now you can check the version of JDK installed.
Step 3: Check JDK version on your computer
java -version
It should display the version of JDK installed on your Ubuntu operating system. Here is output on my system:
deepak@deepak-VirtualBox:~$ java -version
openjdk version "1.8.0_252"
OpenJDK Runtime Environment (build 1.8.0_252-8u252-b09-1~18.04-b09)
OpenJDK 64-Bit Server VM (build 25.252-b09, mixed mode)
deepak@deepak-VirtualBox:~$
Finally OpenJDK 8 is installed our Ubuntu 18.04 operating system. In this tutorial you learned to install OpenJDK 8 on Ubuntu 18.04 operating system.
Check more tutorials at: