
Spring Boot Tutorial- Spring Boot Console Application
Welcome to the first example of Spring Boot, today we will teach you to create your first application in Spring Boot. As you already know you can create console and web applications in Spring Boot. Here we will teach you the steps to create the first console based Spring Boot applications that simply prints Hello World massage on the console. We have provided you the Eclipse project that you can download and import in your Eclipse IDE.
So, let's get started and create a simple console-based application that prints messages on console using the Spring Boot.
We are using Eclipse Neon IDE for this project but you can use any version of Eclipse having maven in-built support.
Step 1: Eclipse IDE and JDK
First of all make sure you have installed JDK and Eclipse IDE on your system. If you don't have JDK then download open JDK and install on your System. You can use any latest version of Eclipse for running the example code given here.
You can download the source code of the Spring Boot Console Application and import in Eclipse IDE. If you want to check the steps to import a Maven (Maven Eclipse) project in Eclipse then check the tutorial: How to import existing maven project in eclipse?
Step 2: Adding required maven dependency
Open the pom.xml file in your Eclipse project editor and then add following maven dependency:
<parent>
	<groupId>org.springframework.boot</groupId>
	<artifactId>spring-boot-starter-parent</artifactId>
	<version>2.2.4.RELEASE</version>
	<relativePath/>
</parent>
The above dependency is from the Spring Boot and it ads the Spring Boot starter application configuration.
Our project is based on the spring boot starter configuration and it can be included with above code
We just need the following initial dependency for this project:
<dependency>
<groupId>org.springframework.boot</groupId>
<artifactId>spring-boot-starter</artifactId>
</dependency>
Step 3. Write Console Application
The CommandLineRunner is part of the Spring Boot framework which is used to execute the code after the start of Spring Boot application. Developers can also use the ApplicationRunner class for running code just after the start of Spring Boot application. Both the classes ApplicationRunner and CommandLineRunner come with the Spring Boot library, which can be used for running the Java code after the start of application. In this example code we will use CommandLineRunner class for running our test code immediately after the start of Spring Boot application.
The Spring Boot Starter Parent is the default configuration that comes with the Spring Boot Framework. It is provided by Spring Boot Framework for better management of dependency in the Spring Boot based project. The Spring Boot Starter Parent quickly helps in building the Spring Boot applications.
The Spring Boot Starter Parent(spring-boot-starter-parent ) is a special project from Spring Boot which works as a started project which includes default configuration for application development and comes with the compatible maven dependency tree for the released version. The default spring-boot-starter-parent project also provides the Maven plugins such as maven-failsafe-plugin, maven-jar-plugin, maven-surefire-plugin, maven-war-plugin and many others.
The Spring Boot Starter Parent also inherits the dependency management tree from spring-boot-dependencies, which makes application development easy and fast.
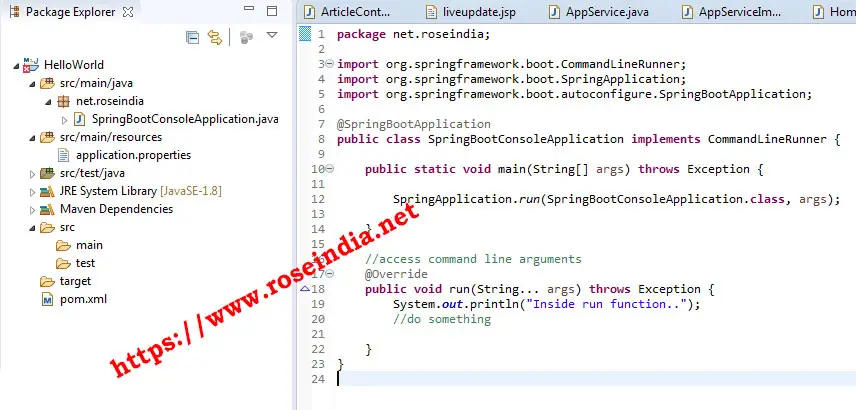
Here is the complete code of the program which prints message on the console:
package net.roseindia;

import org.springframework.boot.CommandLineRunner;
import org.springframework.boot.SpringApplication;
import org.springframework.boot.autoconfigure.SpringBootApplication;

@SpringBootApplication
public class SpringBootConsoleApplication implements CommandLineRunner {

    public static void main(String[] args) throws Exception {

        SpringApplication.run(SpringBootConsoleApplication.class, args);

    }

    //access command line arguments
    @Override
    public void run(String... args) throws Exception {
    	System.out.println("Inside run function..");
        //do something

    }
}
Here is the screen shot of the code in Eclipse IDE:
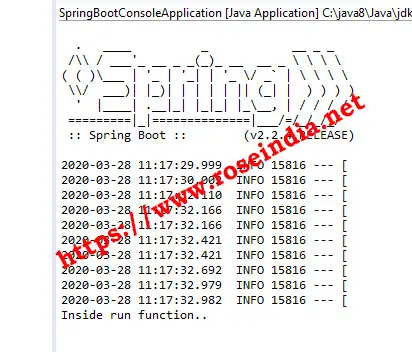
Step 4: Running the Spring Boot Console Application
Now everything is setup correctly, we can now run the application. In the Eclipse open the SpringBootConsoleApplication .java file and then right click and selection run as --> Java Application. This will instruct Eclipe IDE to run your code.
In this tutorial you learned to develop your first Spring Boot Console application.
- Download Source Code
You can check more tutorials at: