Wicket on Net Beans IDE
This tutorial will take you through the basics of creating and assembling a web application using the Wicket web framework. In it each application consists of simply JAVA file and HTML file. Each and every component in this web framework application is created in java and it is later rendered into the HTML page.
Wicket Introduction
Apache Wicket is a Java open source component based framework that was released by Wicket Team, which is just like that Java Server Faces and Tapestry in a conceptual manner. Using apache wicket we can logically separate the design and coding files, as it focus on providing valid html files. Apart from this apache wicket has simplified several core API's and improved more robust header contributions. It has also added a new Java Script dependencies to the page header.
Here we are going to discuss with you the step by step procedure to run Wicket on Net Beans IDE.
First of all you must have Wicket Framework on your Net Beans IDE. If you do not have this then install the proper Wicket plugins from the Net Beans IDE.
Step:1 Start Net Beans

Step:2 Create new project by File >> New Project

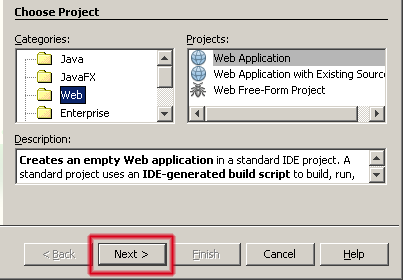
Step:3 Select Web Application from Projects categories and click on Next Button
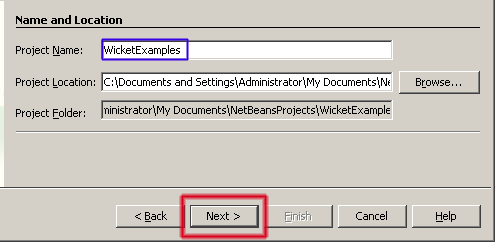
Step:4 Input project name and click on Next
Step:5 Select the Web Server (e.g in our example GlassFish V3 TP2) click on next

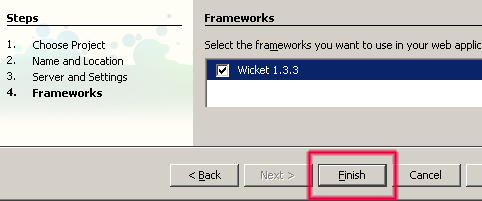
Step:6 Select the Wicket framework and click on Finish
Step:7 Now in project explorer you will get the following output as shown below:
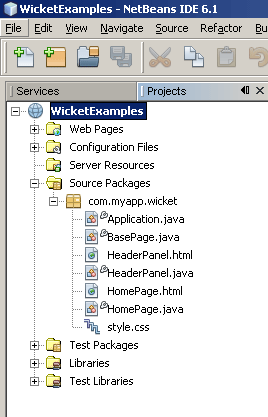
It will create directory structure as above mentioned and in Source Packages directory following files would be created automatically
- Application.java
- BasePage.java
- HomePage.java
- HeaderPanel.java
- HeaderPanel.html
- HomePage.html
- style.css
Now if you want to see that what have been done so far you can check it by running this project.
Step:8 Right Click on WicketExample and select command Run

You will get the following output on your browser:
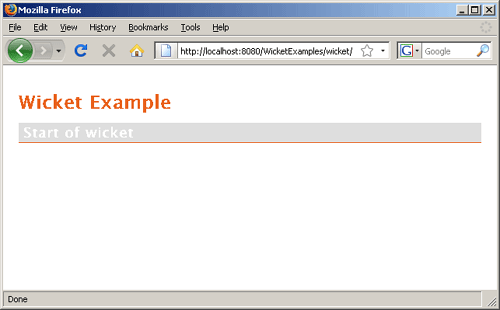
Which means that you have set all environments successfully for Wicket.


