Guide to download and install Tomcat 6


Downloading and installing tomcat
In this section we will show the process to downloading and installing Tomcat 6 on your computer system. The steps of downloading and installing are easy and you can learn the process very fast. First of all learn the steps of 'How to download Apache Tomcat server on your computer'. Click the link: http://tomcat.apache.org/download-60.cgi and follow the steps according to your requirement to achieve Tomcat server.
Step 1:
Installation of JDK:
Before beginning the process of installing Tomcat on your system, ensure
first the availability of JDK on your system program directory. Install
it on your system if not already installed (because any version of tomcat requires the Java
1.6 or higher versions) and then set the class path (environment variable) of JDK.
To set the JAVA_HOME Variable: you need to specify the location of the java run time environment
to support the Tomcat else Tomcat server can not run.
This variable contains the path of JDK installation directory.
| set JAVA_HOME=C:\Program Files\Java\jdk1.6 |
Note: it should not contain the path up to bin folder. Here, we have taken the
URL path according to our installation convention.
For Windows OS, go through the following steps:
| Start menu->Control Panel->System->Advanced tab->Environment Variables->New->set the Variable name = JAVA_HOME and variable value = C:\Program Files\Java\jdk1.6 |
Now click on all the subsequent ok buttons one by one. It will set the JDK path.
Step 2:
For setting the class path variable for JDK, do like this:
| Start
menu->Control Panel->System->Advanced tab->Environment
Variables->New-> Set PATH="C:\Program Files\Java\jdk1.6\bin"; %PATH% |
OR
First, right click on the
| My Computer->properties->advance->Environment Variables->path. |
Now, set bin directory path of JDK in the path variable
Step 3:
The process of installing Tomcat 6.0 begins here from now. It takes various steps for installing and configuring the Tomcat 6.0.
For Windows OS, Tomcat comes in two forms: .zip file and .exe file (the Windows installer file). Here we are exploring the installation process by using the .exe file. First unpack the zipped file and simply execute the
'.exe' file.
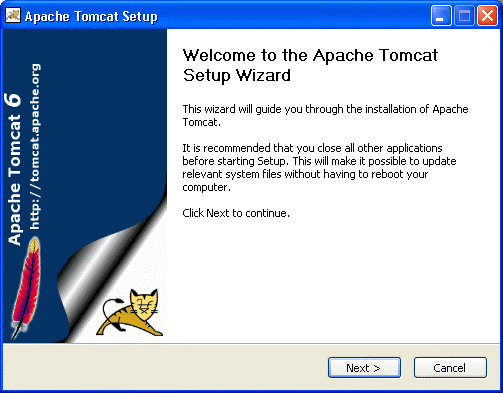
A Welcome screen shot appears that shows the beginning of installation process. Just click on the 'Next' button to proceed the installation process.
Steps 4:
A screen of 'License Agreement' displays.
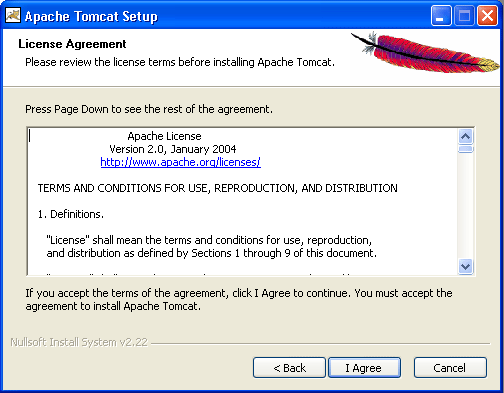
Click on the 'I Agree' button.
Step 5:
A screen shot appears asking for the 'installing location'
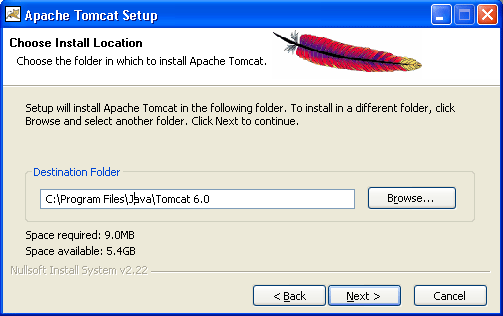
Choose the default components and click on the 'Next' button.
Step 6:
A screen shot of 'Configuration Options' displays on the screen. Choose the location for the Tomcat files as per your convenience. You can also opt the default Location
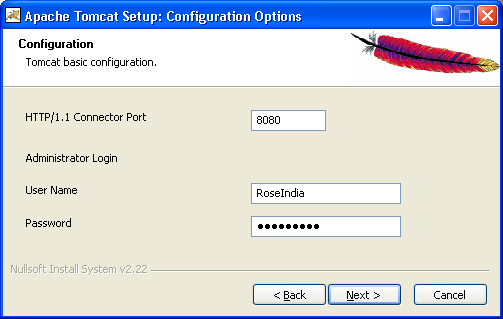
The port number will be your choice on which you want to run the tomcat server. The port number 8080 is the default port value for tomcat server to proceed the HTTP requests. The user can also change the 'port number' after completing the process of installation; for this, users have to follow the following tips.
Go to the specified location as " Tomcat 6.0 \conf \server.xml ". Within the server.xml file choose "Connector" tag and change the port number. 0
Now, click on the 'Next' button to further proceed the installation process.
Step 7:
A Window of Java Virtual Machine displays on the screen 1
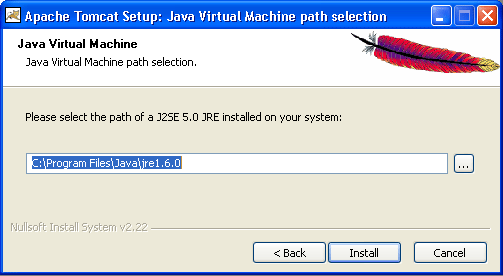
This window asks for the location of the installed Java Virtual Machine. Browse the location of the JRE folder and click on the Install button. This will install the Apache tomcat at the specified location.
Step 8: 2
A processing window of installing displays on the screen.

To get the information about installer click on the "Show details" button 3
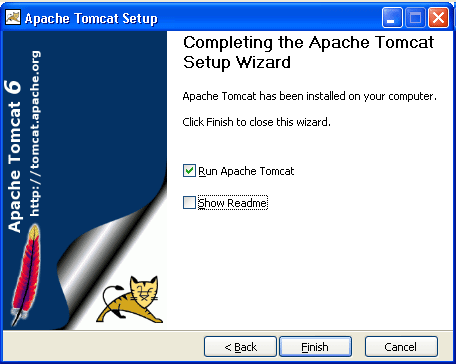
Step 9:
A screen shot of 'Tomcat Completion' displays on the screen.
 4
4
Click on the 'Finish' button.
Step 10:
A window of Apache Service Manager appears with displaying the running process. 5
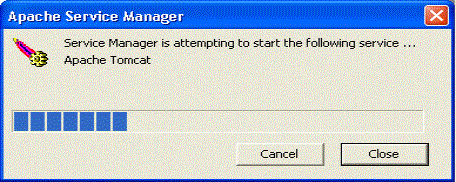
Let the running process goes on.
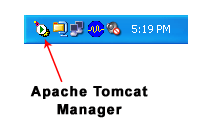
Step 11: 6
After completing the installation process, the Apache Tomcat Manager appears on the toolbar panel like shown in the below picture.
Configuring Tomcat Manager
To Configure the Tomcat Manager, there are two ways; either user can configure Tomcat directly from the toolbar panel or can configure it from Control Panel Section. 7
i-) Configuring from toolbar Panel
To Configure Apache Tomcat web server from the toolbar panel, you have to press 'double click' on the appeared icon.
 8
8
A configured window appears on the desktop. Now, just click on the Startup button. The installation process will be completed.
ii-) Configuration from the Control Panel
To configure the Apache Tomcat Manager, Users will have to follow the follwing steps: 9
Click on the Start up button -- select Control Panel -- Administrator Tool -- Services -- select Apache Tomcat.
The following screen displays on the monitor.
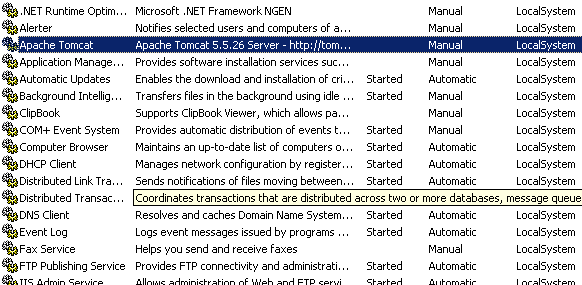
0
Double click on the Apache Tomcat. The window of Apache Tomcat Properties appears on the screen.
Now, Click on the start up button. The Apache Tomcat is now ready to function. 1
To operate it, follow the below steps of processing.
Start the Tomcat Server:
1.Start the tomcat server from the bin folder of Tomcat 6.0 directory by double clicking the "tomcat6.exe" file.
OR create a shortcut of this .exe file at your desktop.
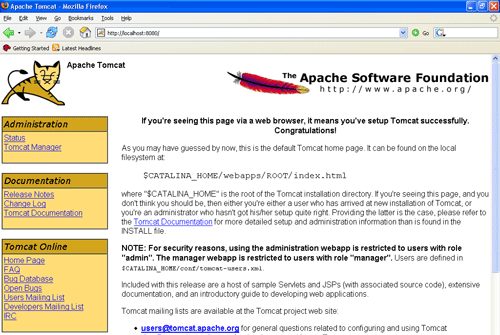
2. Now Open web browser and type URL http://localhost:8080 in the address bar to test the server
3. To Stop the Tomcat Server: Stop the server by pressing the "Ctrl + c" keys.
2
The screen of Apache Tomcat software looks like this:
|