
JAX-RPC Advance Concepts


Make a web service program which can persists the records of a student in the exam table.It should use SOAP Request and SOAP Response.
SolutionTo solve the preceding problem, following tasks have to be performed:
- Use the netbeans
- Make a stud table in the jdbc:derby database
- Create a Web project
- Develop a Web Service program for student
- Create a exam operation in the web service
- Add enterprise resources for the database
- Edit source code
- Build & deploy the project
- Test the web service
This is a small database software bundled with Netbeans in glassfish server.It is easy to create a database, create a table, make the queries
over it.User can connect easily the enterprise program,web service program and web program with derby database software.
- Open the Netbeans software
- Navigate to the services tab
- Open database folder and select the derby database
- Right Click and select start the server as given below in figure 1
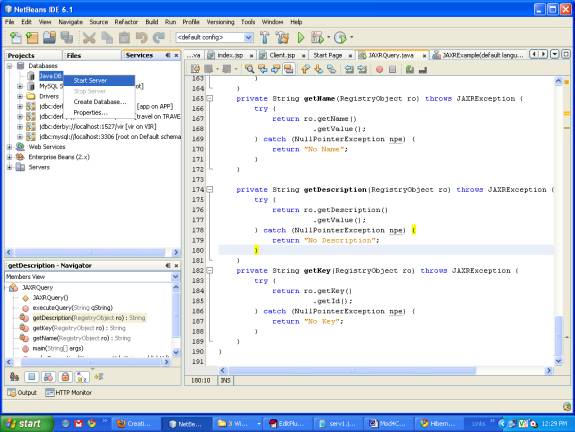
Figure 1
- Select the sample database or you can create one
- Right Click and Select Connect as given below in Figure 2.
- It will connect to the sample database
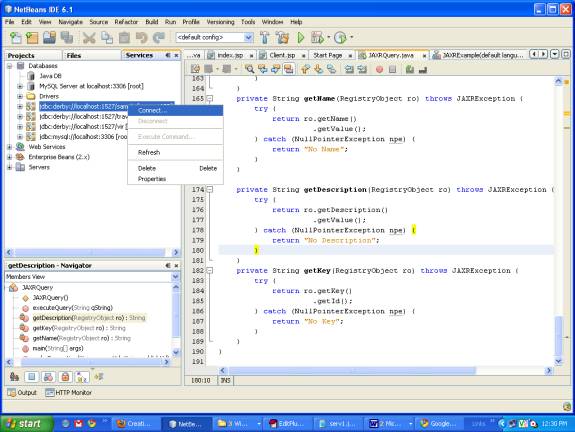
Figure 2
- Right Click and select Create table as given
- It will Open a dialog box as shown below in Figure 3
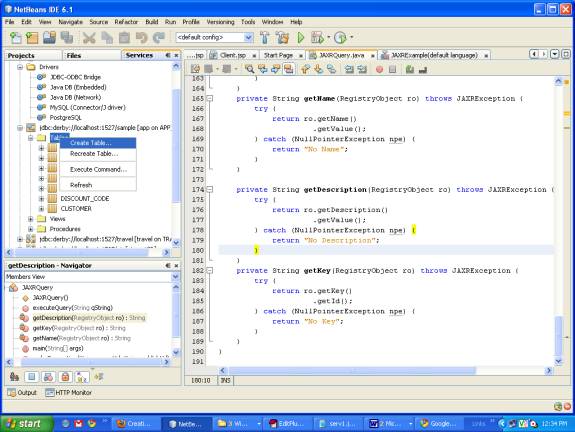
Figure 3
- In this dialog box give the table name as stud
- Now add the columns
- Add the two columns
- Roll with data type numeric and Name with data type char
- Do all steps as shown below in Figure 4.
- It create a stud table a sample database
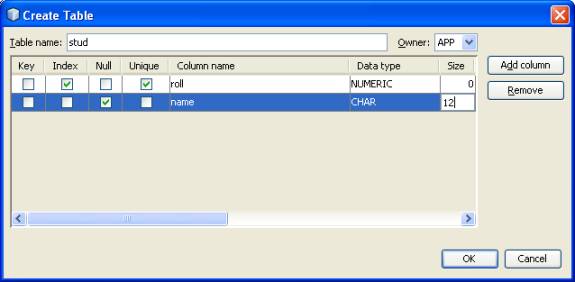
Figure. 4 Creating Web Service project
- Create a new web project
- Give a name as jaax2
- Select the server as glassfish
- Click on the finish as shown below in Figure 5
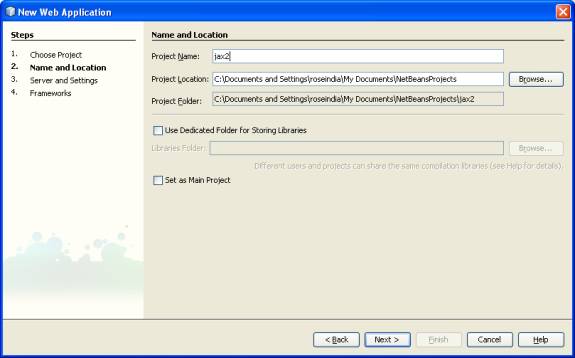
Figure 5
- Right Click on the project
- Select NewàWeb Service
- Type name as stud
- Type package as pack1 as shown below in Figure 6
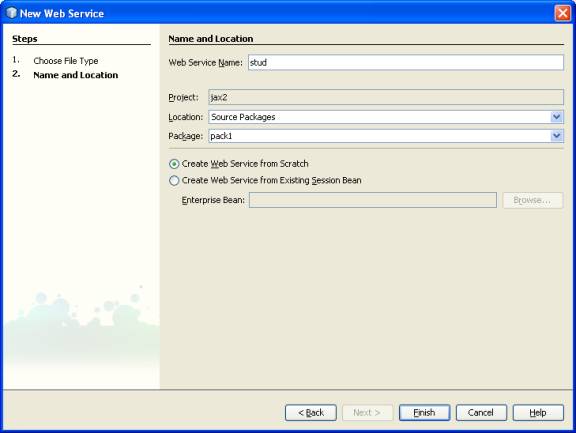
Figure 6
- This will create a stud Web Service class
- In the design view Click on the Add Operation
- It will generate a Add operation Dialog Box as shown below in Figure. 7
––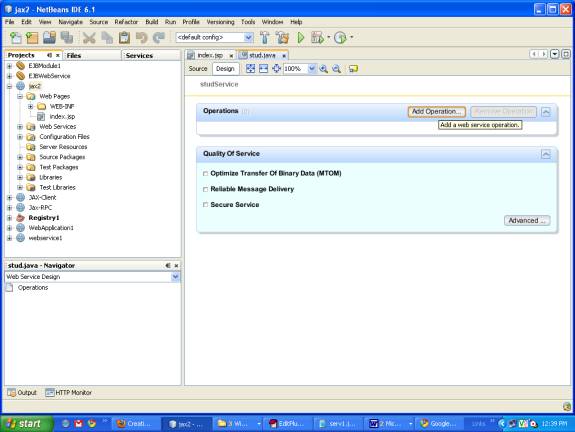
Figure. 7
- In the pop up dialog box give the operation name and parameters
- Operation name exam
- Return type String
- Parameters name roll and name
- Follow the steps according to Fig 8 given below

Figure. 8
It creates a full web service class as shown below
package pack1;
import javax.jws.WebMethod;
import javax.jws.WebParam;
import javax.jws.WebService;
@WebService()
public class stud {
@WebMethod(operationName = "exam")
public String exam(@WebParam(name = "roll")
int roll, @WebParam(name = "name")
String name) {
//TODO write your implementation code here:
return null;
}
}
Adding Database capabilities
- Database and table created above is used in the web service
- Right Click in the code of Web Service
- Select the Enterprise ResourcesàUse Database as shown
Below in Figure. 9.
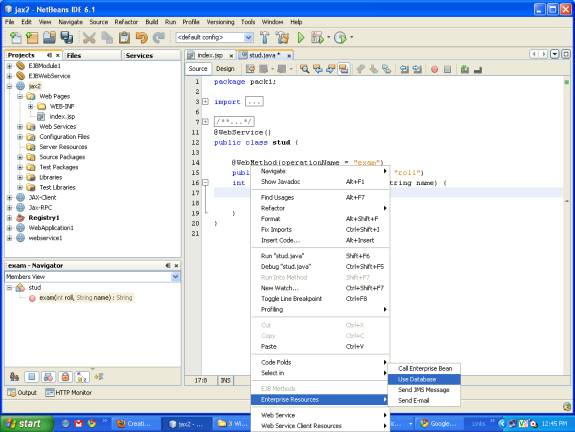
Figure. 9
- Add the data source reference
- Type Reference name data1
- Select jdbc/sample Server Data Source as shown below in Fig 10.
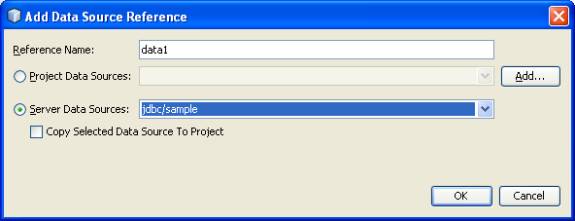
Figure. 10
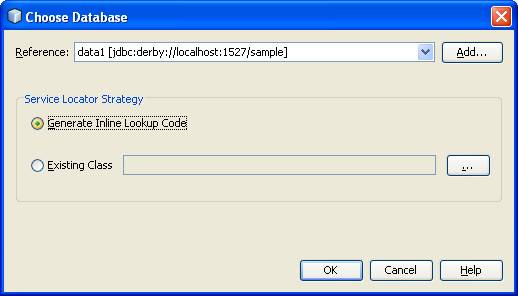
- Click on Ok as shown below in Fig. 11.
 0
0
Figure. 11
- This creates Data Source reference variable data1 at the top of method
- Now make changes inn code for database connection as shown in code
package pack1; 1
import java.sql.Connection;
import java.sql.PreparedStatement;
import javax.annotation.Resource;
import javax.jws.WebMethod;
import javax.jws.WebParam;
import javax.jws.WebService;
import javax.sql.DataSource;
@WebService()
public class stud {
@Resource(name = "data1")
private DataSource data1;
@WebMethod(operationName = "exam")
public String exam(@WebParam(name = "roll")
int roll, @WebParam(name = "name")String name) {
String status="record not inserted";
try {
Connection con=data1.getConnection();
PreparedStatement ps=con.prepareStatement("INSERT INTO stud VALUES(?,?)");
ps.setInt(1,roll);
ps.setString(2,name);
int i=ps.executeUpdate();
if(i!=0) {
status="record inserted";
}
}
catch(Exception e){
System.out.println("error in strong data"+e);
}
return status;
}
} 2
Running The project
- Build the above created project
- Deploy the project on the server as shown below in Figure. 12
- This deploys the project on the server
- We can now run our Web Service

Figure. 12
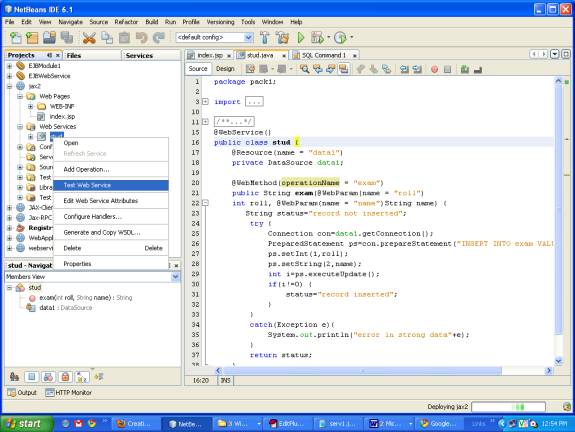
- Right Click on Web Service stud
- Select Test Web Service as shown below in Figure. 13
 3
3
Figure 13
- It open Web Service in the browser
- Give the 1 and jack in text boxes
- Text boxes are actually arguments of web method
- Click on exam button as shown below in Fig. 14
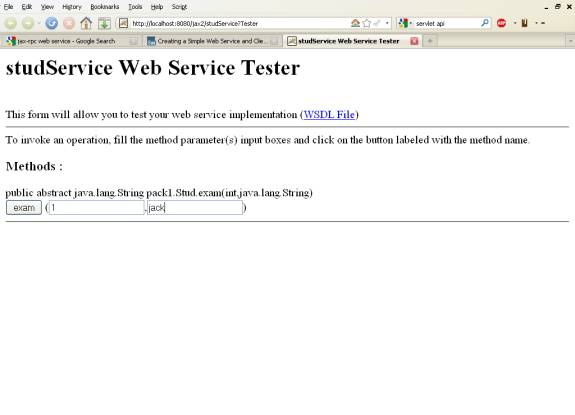
Figure. 14 4
- Exam Buttons are actually method name of the Web Service
- This will result the value with SOAP request and SOAP response
As shown below in Figure 15.
- It will insert the values in the Derby Database table
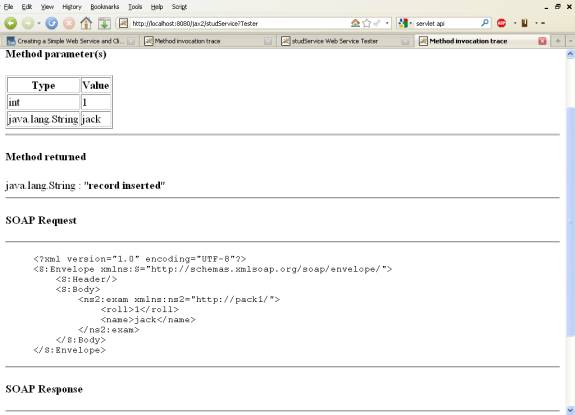
Figure 15 5
- Check the inserted values in the table
- Right Click on the stud table in derby database
- Select View Data as shown below in Figure 16.
- It shows the inserted data as shown below in Figure 17.
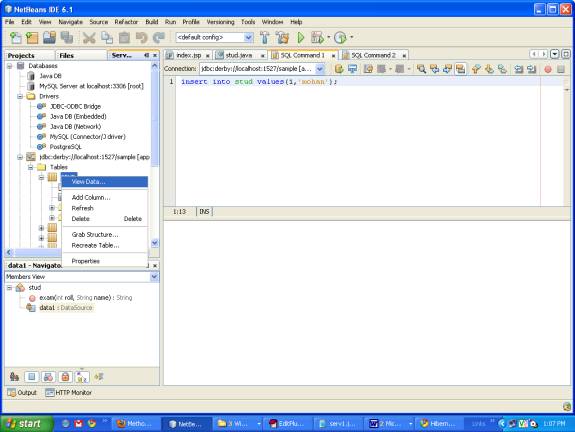
Figure 16
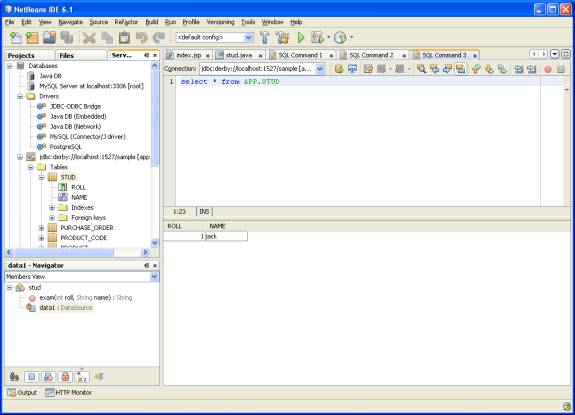
Figure 17 6 Client Web Service
- Take a new Web Application Project
- Type name jax2Client
- Click on Next as shown below in Figure. 18
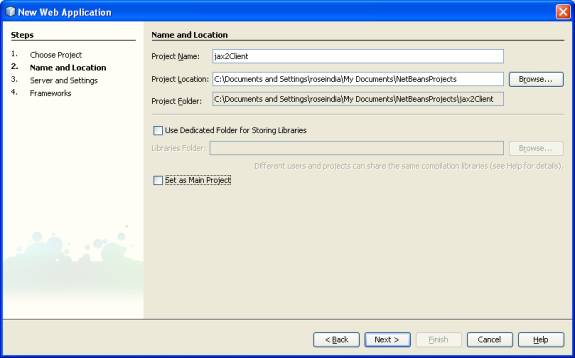
Figure. 18
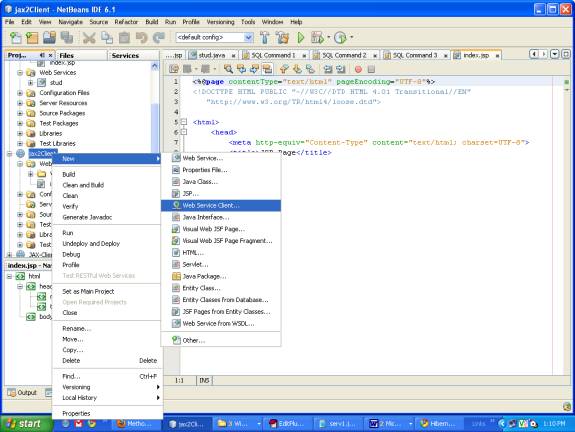
- Right Click on the project jax2Client.
- Select the NewàWeb Service Client as shown below in Figure. 19
- It creates a dialog box for WSDL and Client Location
 7
7
Figure 19
- Now select either the project or give the WSDL URL
- Click on Next as shown below in Figure. 20
- Click on the Finish Button
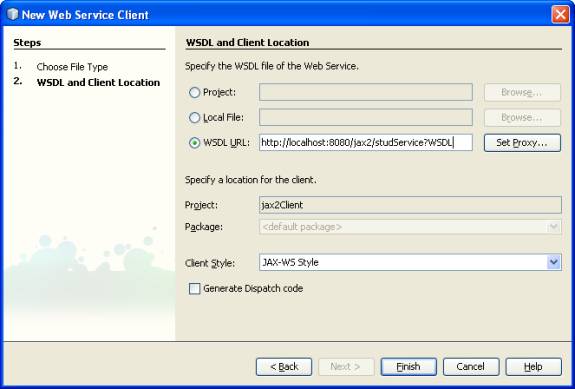
Figure. 20
Client.jsp 8
- Now make a Client.jsp file
- Right Click on the Project jax2Client
- Select NewàJsp file
- Give the name as Client1.jsp
- Right Click in the code of Client1.jsp
- Select Web Service Client Resources as shown below in Figure. 21
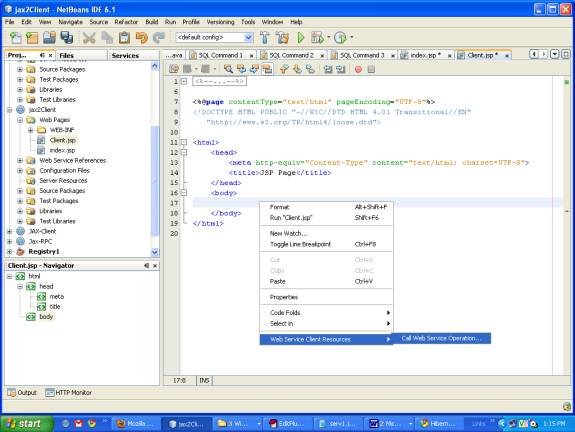
Figure. 21
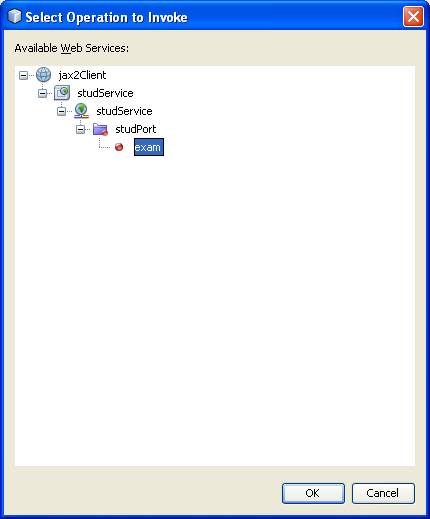
- Select the operation in the Client project jax2ClientàstudServiceàstudPortàexam
- As shown below in Figure. 22
 9
9
Figure. 22
- The above steps generates code in Client.jsp
- It gives the stud Web Service object, Stud port and operation name code
- In two arguments name and roll initialize the value.
As shown below in Figure. 23.
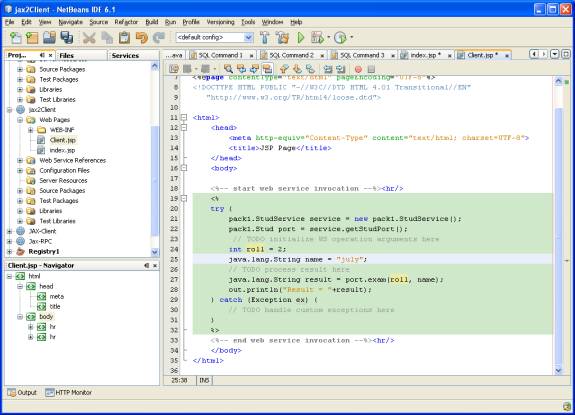
Figure. 23 0 Running The Client file
- Deploy the jax2Client project
- Right Click in Client.jsp and select Run Client.jsp
As shown below in Figure. 24.
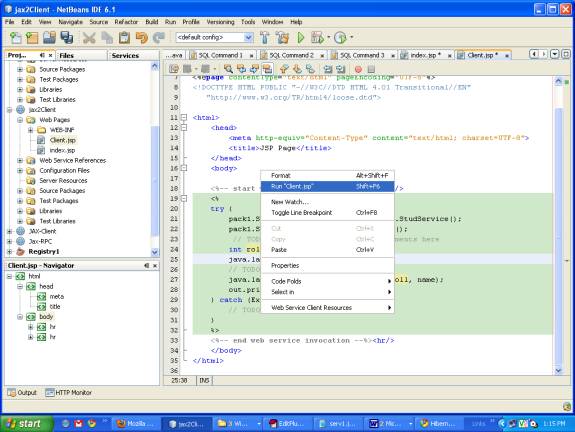
Figure. 24
- It runs the file in the Internet Browser
- It gives the status message record inserted
- In case of failure it will display record not inserted
Aas shown below in Figure. 25 1
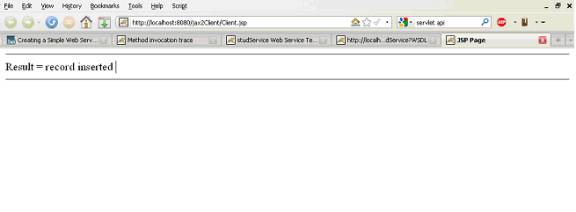 Figure. 25
- On running the Client.jsp it inserts the value into the table
- To view the table data Right Click on the stud table in sample database in derby
- It fetches the records and display it in table as shown below in Figure 26
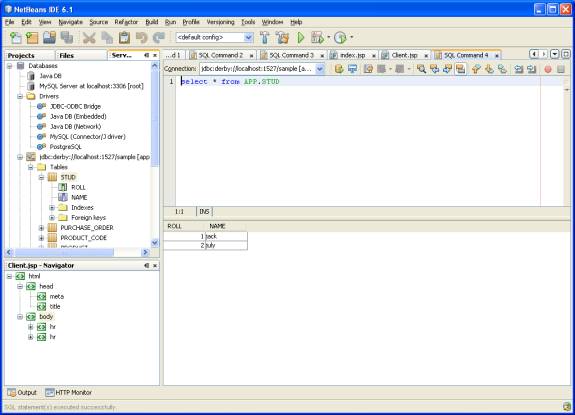
Figure. 26 2