Overview of Student Management System application - Spring Boot 4 Based Student Management System
In this section we are going to provide you the overview of the system and screenshots of all the important screens. As mentioned earlier we are managing the list of student into the database and for this we are making various screens which will enable the users to enter data on screen. There are screens for adding, updating, viewing and deleting the students. All our application can be accessed from the web browser. You can use web browser such as Chrome to access the student management system.
After running the application in Eclipse you can browse to http://localhost:8080 and following screen will be displayed.

There is option to add student in the system. Click on the "Add Student" option and this will display add student option as shown below:
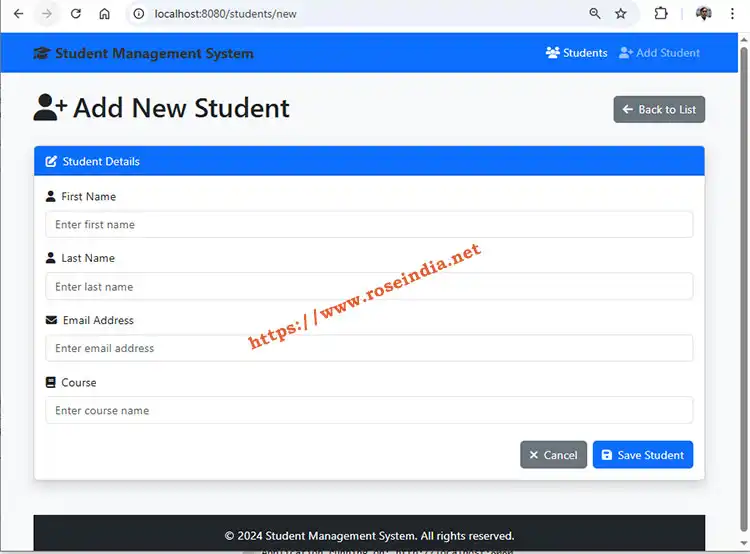
When user clicks on the "Save Student" button, form fields are validated and if everything is find data is saved into system and student list page id displayed. Success message is also displayed on the addition of user into system.
Here is the screenshot of Student list page:
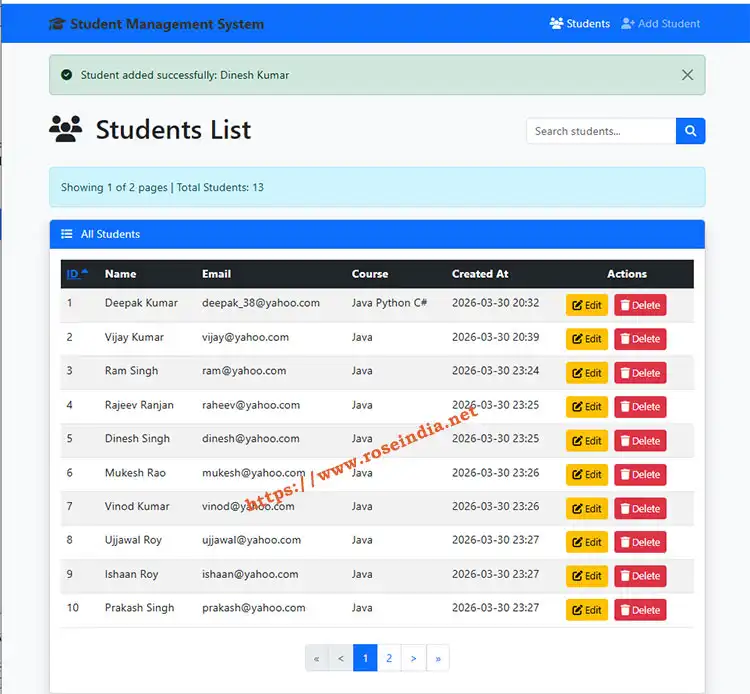
Here on the screen each student is displayed and there is option to "Edit" and "Delete" Student. On the click of "Edit" Edit screen is displayed with pre-filled values and user should be able to edit the user. On clicking on the "Delete" button confirmation message is asked from the user and if user opts for deletion of user, user is deleted from the system.
There is an option to search the user and here you will be able to type student name and click search icon to search the students.
This is well developed program by following all the coding standards so that you can learn to create applications in Spring Boot 4. You will learn to create database, entity, model, service and controller classes to make complete functioning application. In this tutorial we have used MySQL as backend of the application. Java 17 and Eclipse IDE is used to run the application.
Spring Boot 4 application uses tomcat to run the application at port 8080 and you can use the web browser to test this application.
The pre-requisite of this application are:
- Prior experience in Java
- Understanding of HTML
- Prior experience in MySQL
- Understanding of working of web application
- Prior knowledge of application development in Spring Boot
After completion of this tutorial you will be able to work on the Spring Boot 4 based enterprise applications. We have provided you the source code of this application so that you can easily import the project in Eclipse and pay around with it. You will find the source code link on the index page of this tutorial.
Related Tutorial: