
Controller Interface


Controller Interface implementation example in Spring 2.5 Web MVC framework:-
In this section we will see the example of Controller Interface in Spring MVC.The Base portlet Controller interface (org.springframework.web.servlet.mvc.Controller) is a components that receives RenderRequest/RenderResponse and also the ActionRequest/ActionResponse in the same was as a Portlet. The difference is that it also participate in an MVC workflow.
The implementation of org.springframework.web.servlet.mvc.Controller is reusable and threadsafe. The implementation class is also capable of handling multiple.
In this tutorial we have created our controller by extending org.springframework.web.servlet.mvc.Controller interface. Here we will create a Spring 2.5 Web MVC example that used Controller Interface for control the user request.
Step 1:
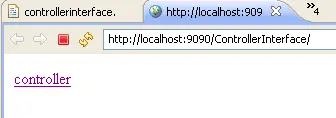
Now we will create a index.jsp in project WebContent folder that contains a hyperlink "Controller" that linked "controllerinterface.html". When user click on this link a request will generate. The code of the index.jsp is:
|
<%@ page contentType="text/html" pageEncoding="UTF-8"%>< html> <body> <a href="controllerinterface.html">controller</a> </body></ html> |
Step 2:
Now we will modify the web.xml for set the DispatcherServlet for this application and set the welcome file. The code of the web.xml is:
|
<? xml version="1.0" encoding="UTF-8"?>< web-app version="2.5" xmlns="http://java.sun.com/xml/ns/j2ee" xmlns:xsi="http://www.w3.org/2001/XMLSchema-instance" xsi:schemaLocation="http://java.sun.com/xml/ns/j2eehttp://java.sun.com/xml/ns/j2ee/web-app_2_5.xsd" > <servlet> <servlet-name>dispatcher</servlet-name> <servlet-class>org.springframework.web.servlet.DispatcherServlet</servlet-class> <load-on-startup>1</load-on-startup> </servlet> <servlet-mapping> <servlet-name>dispatcher</servlet-name> <url-pattern>*.html</url-pattern> </servlet-mapping> <welcome-file-list> <welcome-file>index.jsp</welcome-file> </welcome-file-list> </ web-app> |
Step 3:
Now we will create a dispatcher-servlet.xml file inside the project WEB-INF folder. The dispatcher-servlet.xml have the bean setting for viewResolver, urlMapping for assign the controller for the particular request. The code of the dispatcher-servlet.xml is: 0
|
<? xml version="1.0" encoding="UTF-8"?>< beans xmlns="http://www.springframework.org/schema/beans" 1 xmlns:xsi="http://www.w3.org/2001/XMLSchema-instance" xsi:schemaLocation="http://www.springframework.org/schema/beanshttp://www.springframework.org/schema/beans/spring-beans-2.5.xsd" xmlns:p="http://www.springframework.org/schema/p"> 2 <bean id="viewResolver" class="org.springframework.web.servlet.view.InternalResourceViewResolver"> <property name="prefix"> 3 <value>/WEB-INF/jsp/</value> </property> <property name="suffix"> 4 <value>.jsp</value> </property> </bean> 5 <bean id="urlMapping" class="org.springframework.web.servlet.handler.SimpleUrlHandlerMapping"> <property name="interceptors"> 6 <list> <ref local="localeChangeInterceptor"/> </list> 7 </property> <property name="urlMap"> <map> 8 <entry key="/controllerinterface.html"> <ref bean="requestController"/> </entry> 9 </map> </property> </bean> 0 <bean id="requestController" class= "net.roseindia.web.RequestControllerInterface"></bean> <bean id="localeChangeInterceptor" class= "org.springframework.web.servlet.i18n.LocaleChangeInterceptor"> <property name="paramName" value="hl"/> 1 </bean> <bean id="localeResolver" class= "org.springframework.web.servlet.i18n.SessionLocaleResolver"/> </ beans> 2 |
Step 4:
Now we will create a RequestControllerInterface.java file inside of the project src folder. In this class we will implements "Controller" Interface for control the user request and return the ModelAndView as response. The application display that response for the user interface. The code of the RequestControllerInterface.java is:
package net.roseindia.web;
import javax.servlet.http.HttpServletRequest;

import javax.servlet.http.HttpServletResponse;

import org.springframework.web.servlet.ModelAndView;

import org.springframework.web.servlet.mvc.Controller;

public class RequestControllerInterface implements Controller {

  public ModelAndView handleRequest(HttpServletRequest request,

  HttpServletResponse response) throws Exception {

  ModelAndView modelandview = new ModelAndView("controllerinterface");

  modelandview.addObject("message", "This is example of Controller Interface");

  return modelandview;

  }

}
Step 5: 3
Now we will create a controllerinterface.jsp file inside the /WEB-INF/jsp/ folder. This jsp file contain code to display the response that will return by the controller. The code of the controllerinterface.jsp is:
|
<%@ taglib prefix="c" uri="http://java.sun.com/jsp/jstl/core" %>< html> 4 <body> <c:out value="${message}"/> </body> 5</ html> |
Step 6:
Now we will run this application and see the output like: 6
After click on this link request controller provide us message as a View like:
 7
7
Download Code