In this tutorial you will learn how to upload a file in servlet 3.0

File Upload Servlet 3.0 Example
In this tutorial you will learn how to upload a file in servlet 3.0
In this example I have used the @MultipartConfig annotation to upload the file. Earlier versions than the servlet 3.0 specification were not involves in handling the file upload.
By introducing the @MultipartConfig annotation in servlet 3.0 it can be possible now. When in any servlet if this annotaion is used it indicates that a servlet ask for request to conform multipart/form-data MIME type. This annotation has some optional elements. These are as follows :
- fileSizeThreshold : It is represents the size of file in bytes that will be stored temporarily on disk.
- location : It denotes a file location where you are required to store the files, path of file should be an absolute.
- maxFileSize : It denotes the maximum size of a file that can be uploaded.
- maxRequestSize : It denotes the size of a file that can be permitted for multipart/form-data requests.
In the example given below there are two methods getParts() and getPart(String name) is used. These two methods are newly added in HttpServletRequest interface.
- getParts() : This method gives the all parts of a collection.
- getPart(String name) : This method gives a part for a specified name.
In this example one more thing is used that is javax.servlet.http.Part interface. This interface has a method named write(String fileName) which writes the file with given name and it also allows for accessing the information such as headers, file size, content type.
Example :
fileUpload.html
<html>
<head></head>
<body>
<p>File Upload Example</p>
<form action="FileUploadServletExample" enctype="multipart/form-data" method="POST">
<input type="file" name="file1"><br>
<input type="Submit" value="Upload File"><br>
</form>
</body>
</html>
FileUploadServletExample.java
package roseindia.ServletFileUpload;
import java.io.IOException;
import java.io.PrintWriter;
import java.util.Collection;

import javax.servlet.RequestDispatcher;
import javax.servlet.ServletContext;
import javax.servlet.ServletException;
import javax.servlet.annotation.MultipartConfig;
import javax.servlet.annotation.WebServlet;
import javax.servlet.http.HttpServlet;
import javax.servlet.http.HttpServletRequest;
import javax.servlet.http.HttpServletResponse;
import javax.servlet.http.Part;

@WebServlet("/FileUploadServletExample")
@MultipartConfig(location="C:\\bipul",
fileSizeThreshold=512*512,
maxFileSize=512*512*5,
maxRequestSize=512*512*5*5)
public class FileUploadServletExample extends HttpServlet {

public void doGet(HttpServletRequest request, HttpServletResponse response)
throws ServletException, IOException
{
ServletContext context= getServletContext();
RequestDispatcher rd= context.getRequestDispatcher("/WEB-INF/fileUpload.html");
rd.forward(request, response);
}

public void doPost(HttpServletRequest request, HttpServletResponse response)
throws ServletException, IOException {
response.setContentType("text/html");
PrintWriter out = response.getWriter();

Collection<Part> parts = request.getParts();

out.write("<h2> Total parts : "+parts.size()+"</h2>");

for(Part part : parts) {
printPart(part, out);
part.write("samplefile");
}

}
private void printPart(Part part, PrintWriter pw) {
StringBuffer strbuffer = new StringBuffer();
strbuffer.append("<p>");
strbuffer.append("File Name : "+part.getName());
strbuffer.append("<br>");
strbuffer.append("Content Type : "+part.getContentType());
strbuffer.append("<br>");
strbuffer.append("File Size : "+part.getSize());
strbuffer.append("<br>");
for(String header : part.getHeaderNames()) {
strbuffer.append(header + " : "+part.getHeader(header));
strbuffer.append("<br>");
}
strbuffer.append("</p>");
pw.write(strbuffer.toString());

}
}
Output :
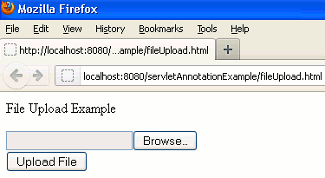
When you will execute the above example you will get the output as :

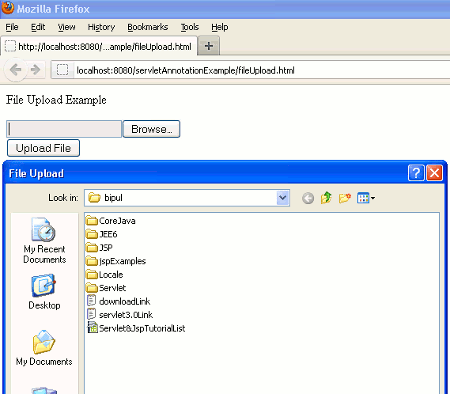
When you will click on "Browse" button or in the text box a dialog box will be open like as :

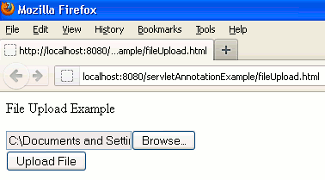
After then you can select your file which you want to upload like I am selected here as :

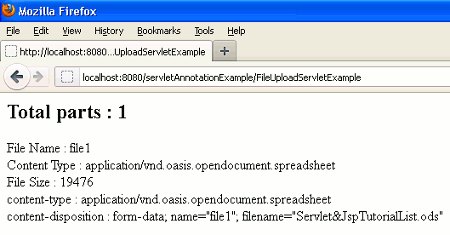
At last when you will click on "Upload File" button the information of uploaded file will be displayed as :

