
Security in Web Service


Project Requirement
Develop a web service program for Square area calculation. Make this web service secured using security mechanism of “Username Authentication with Symmetric Keys”
Solution
- Adding User to Glassfish in Administration
- Make a web project
- Develop web service
- Secure Web Service Application
- Deploy the project
- Make a Client Web project
- Make a Web Service Client
- Edit properties of Web Service
- Deploy and Run the Client
Adding user to GlassFish
To add users to Glassfish using the Admin Console, follow these steps:
- Start the NetBeans
- Start the Glassfish Server as shown below in Fig.1
- Open the Admin Console in the internet browser with the url http://localhost:4848
- Give the User Name admin, password adminadmin
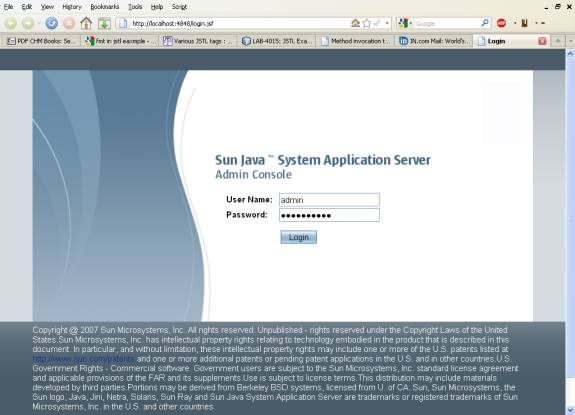
Figure. 1
- After successful login Admin Console gets opened as shown below in Figure. 2
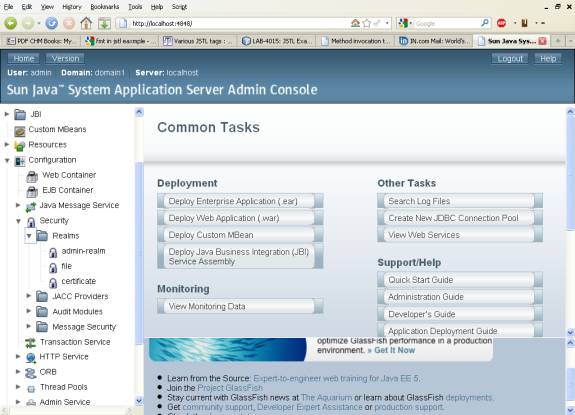
Figure. 2
- Expand the Configuration node in the Admin Console tree.
- Expand the Security node in the Admin Console tree.
- Expand the Realms node. Select the file realm as shown below in Fig. 3
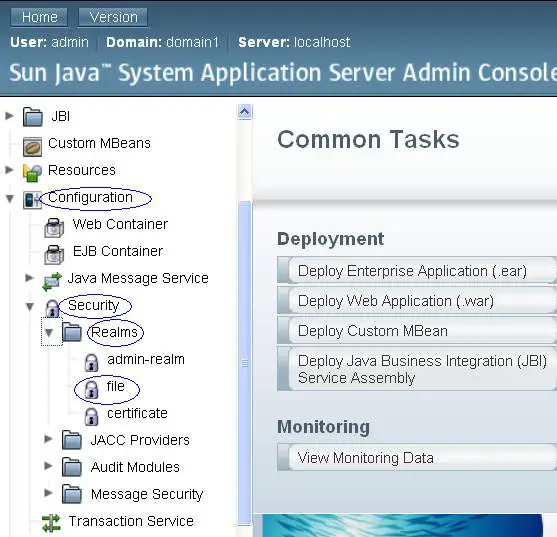
Figure. 3
- Click on New Button for New File Users
- It opens the New File Realm User Form as shown below in Figure 4.
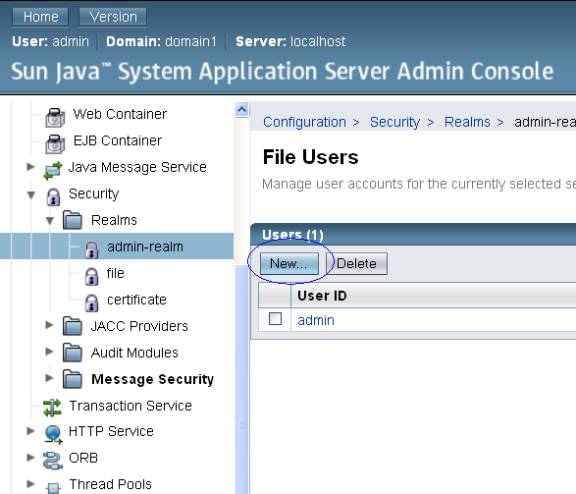
Figure .4
- In the New File Realm User Form give the following values
- User ID = wsitUser
- Group List = wsit
- New Password = changeit
- Confirm New Password = changeit
as shown below in Figure. 5
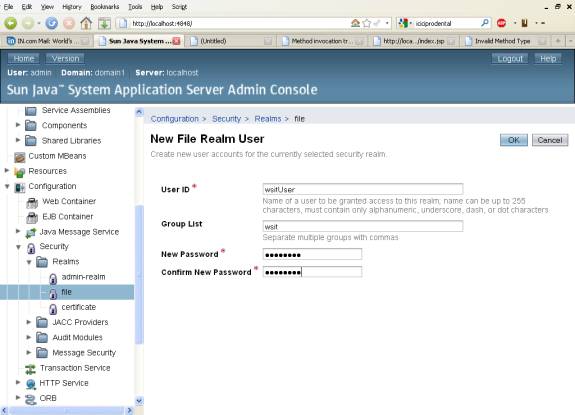
Figure. 5
- Click OK to add this user to the list of users in the realm.
- After user creation, it gets displayed in File Users as shown below in Figure 6.
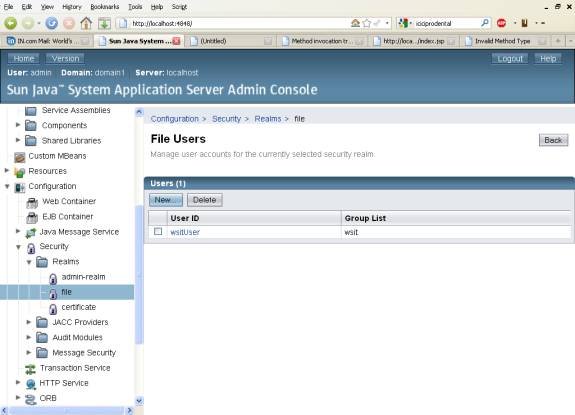
Figure. 6 Web Service Project Creation>
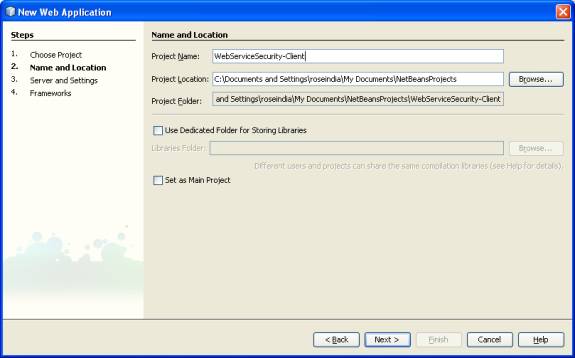
- Create a Web Application Project
- Type the name as WebServiceSecurity.
- Click on Next Button as shown in Figure. 7.
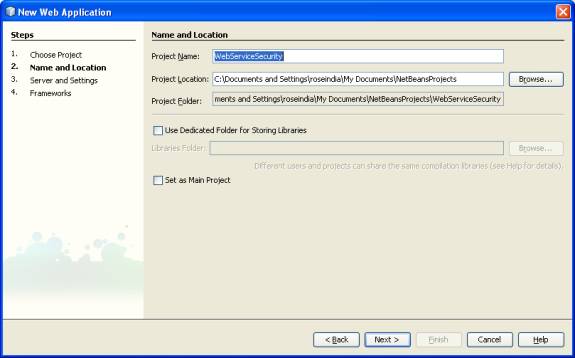
Figure. 7
- Now select the Server
- Select the Glassfish as shown below in Figure 8.
- Click on Finish Button.

Figure. 8 Web Service File Creation >
- The above steps creates a Web Application Project
- Create a Web Service File
- Right Click on the Web Service Security
- Select NewàWeb Service as shown below in Figure. 9.
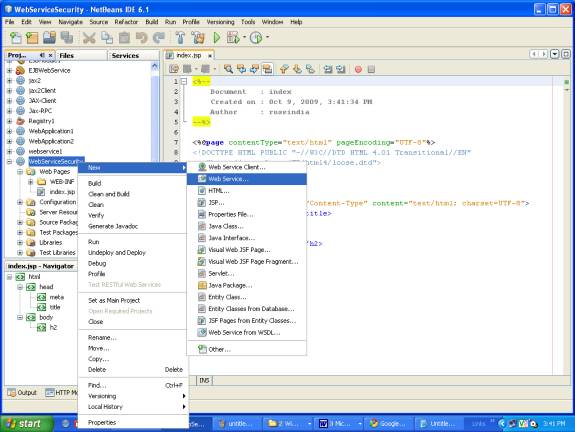
Figure 9
- Type the web service class name as square
- Type the package name as pack1
- Click on Finish as shown below in Figure 10.
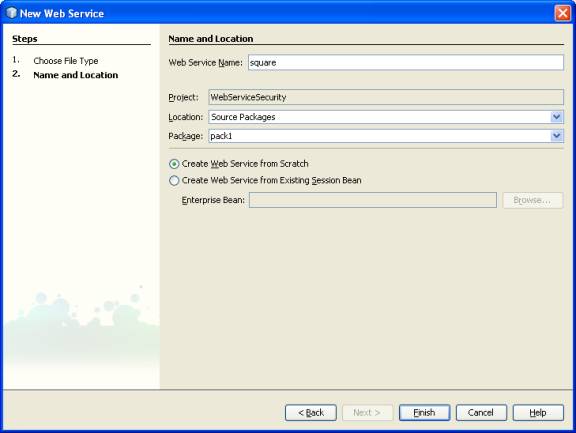
Figure.10
- It creates a Web Service in design view
- Click on Add Operation Button as shown below in Figure 11
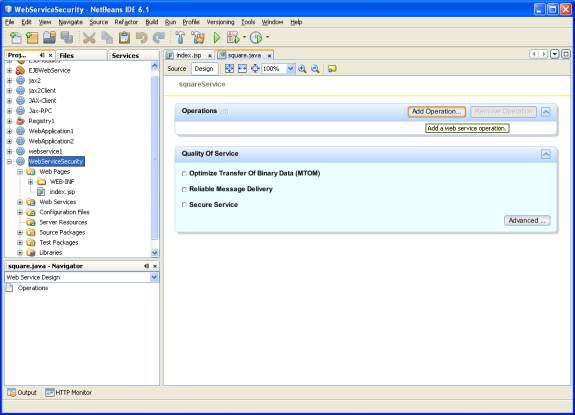
Figure. 11
- Give the operation name as area with return type String
- Click on add to add parameter
- Type the name of parameter as side and type as int.
- Do above steps as shown below in Figure 12.
- It generates the code of operation area.
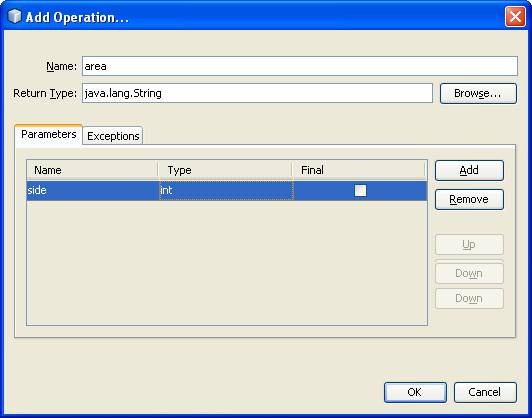
Figure 12
In generated code edit some value as shown below 0
package pack1;
import javax.jws.WebMethod;
import javax.jws.WebParam;
import javax.jws.WebService;
/**
*
* @author roseindia
*/
@WebService()
public class square {
@WebMethod(operationName = "area")
public String area(@WebParam(name = "side")
int side) {
return "area of square of side"+side+" is "+(side*side);
}
}
1
Enabling Security in Web Service>
- Open the square.java Web Service program in design view
- Select the Check box Service Secure as shown below in Fig 13.
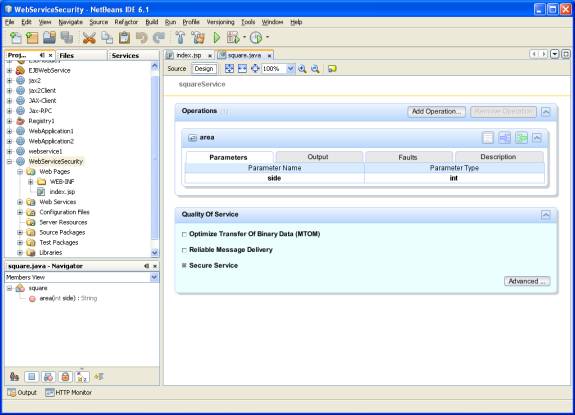
Figure. 13
- Click on Advanced Button
- It opens the dialog box for security
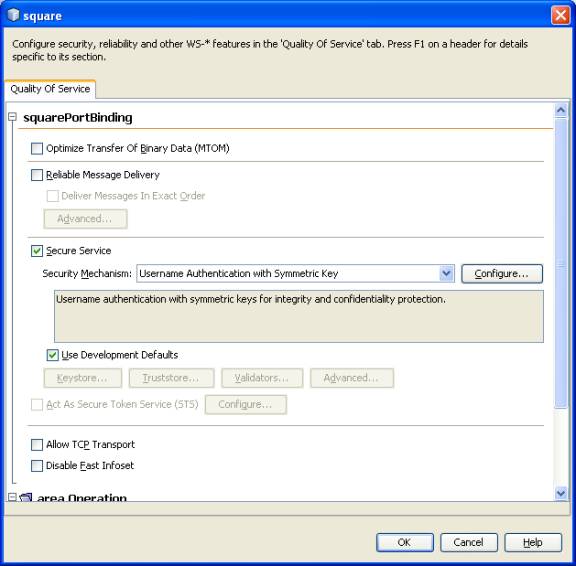
- Select the Secure Service check box as shown below in Figure 14.
 2
2
Figure. 14
- After selecting the secure service, it gets applied for Input Message and Output Message parts
- Scroll down, Input Message and Output Message comes as shown below in Figure 15
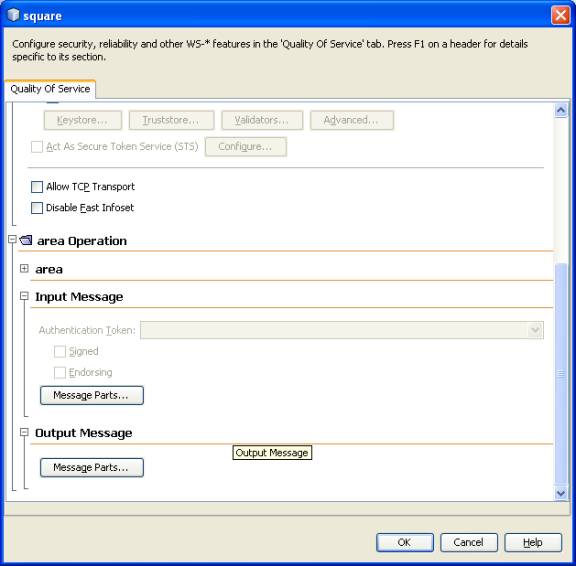
Figure 15 3
- Click on Message Parts button inside Input Message
- It opens dialog box where all values of Sign is selected
- In Encrypt one value for Body Message part is selected as shown below in Figure 16
- Click on Message Parts button inside Output Message
- It opens dialog box where all values of Sign is selected
- In Encrypt one value for Body Message part is selected as shown below in Figure 17
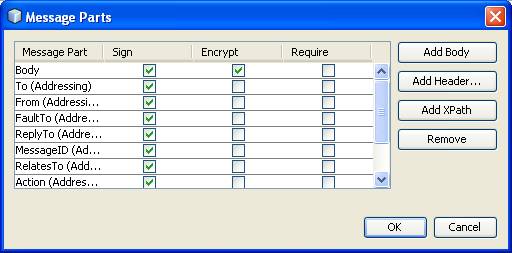
Figure 16
 4
4
Figure 17
Testing Web Service- Right Click on the Web Service square
- Select Test Web Service as shown below in Figure 18.
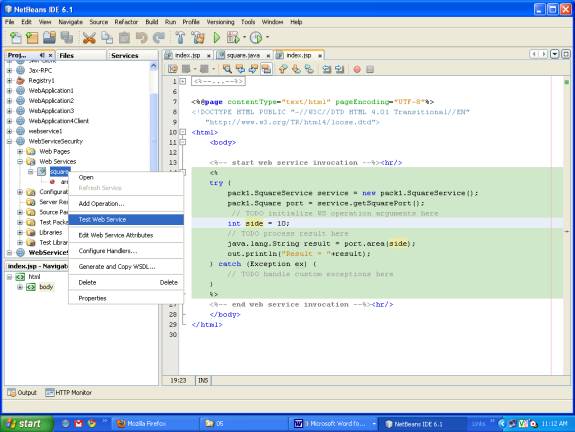
Figure.18 5
- It gives message that secured Web Service doesn’t have support of tester feature as shown below in Figure 19.

Figure. 19
- For above created Web Service a Client is created
- Take a new Web Application Project
- Give it a name WebServiceSecurity-Client
- Click on Next button as shown below in Figure 20.
 6
6
Figure. 20
- Select the Glassfish server
- Click on Next Button as shown below in Figure 21
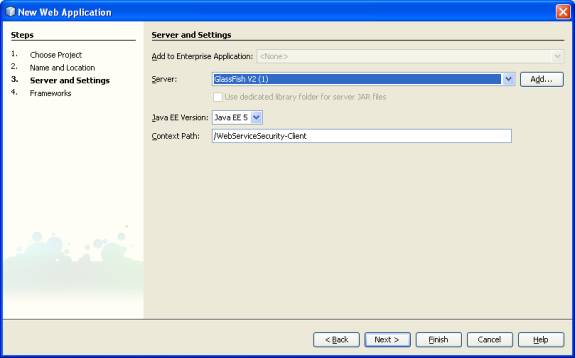
Figure. 21 7
- A Web Service Client project is created
- Develop a java class for Web Service Client
- Right Click on the WebServiceSecurity-Client select NewàWeb Service Client
As shown below in Figure 22.
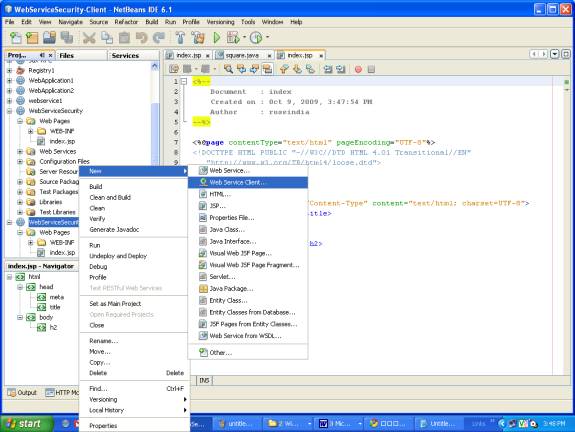
Figure. 22 8
- It opens a dialog box for WSDL and Client location
- Click on the browse button as shown in Figure 23.
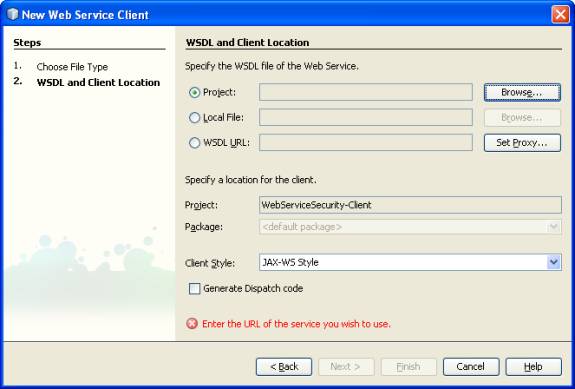
Figure. 23
- In the pop up dialog box select the Web Service
- Select WebServiceSecurity àsquare
- Click on OK as shown below in Figure 24.
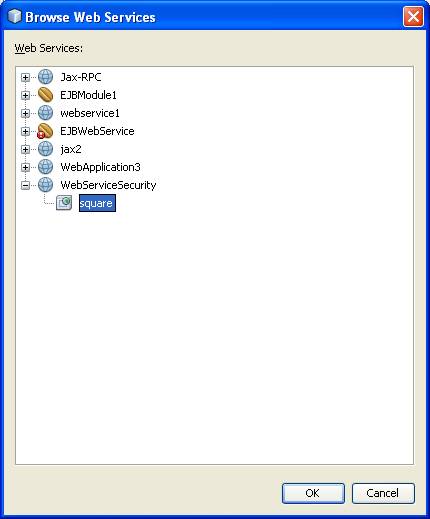 9
9
Figure 24
- This creates a Web Service References Directory
- In side that it creates squareService, squarePort and area method
As shown below in Figure 25.
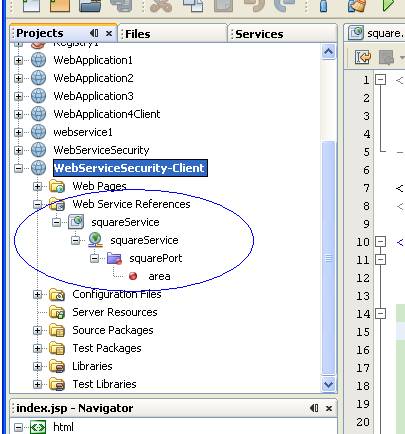
Figure. 25 0 Calling Web Service Client Resources
- Right Click in default created index.jsp
- Select Web Service Client ResourcesàCall Web Service Operation as shown below in Figure 26.
- It creates the required code in the index.jsp
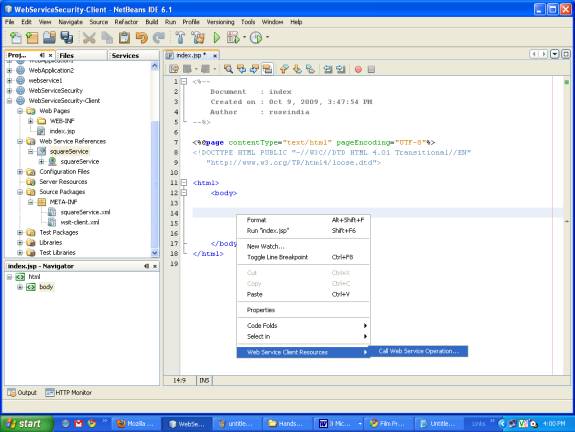
Figure. 26
- Edit the index.jsp and give the value int side=10;
<html>
<body>
<%-- start web service invocation --%><hr/>
<%
try {
pack1.SquareService service = new pack1.SquareService();
pack1.Square port = service.getSquarePort();
// TODO initialize WS operation arguments here
int side = 10;
// TODO process result here
java.lang.String result = port.area(side);
out.println("Result = "+result);
} catch (Exception ex) {
// TODO handle custom exceptions here
}
%>
<%-- end web service invocation --%><hr/>
</body>
</html>
1
Edit Web Service Attributes
- As the web service is secure its client should be edited
- Right Click on squareService in Web Service References
- Select Edit Web Service Attributes as shown below in Figure 27.
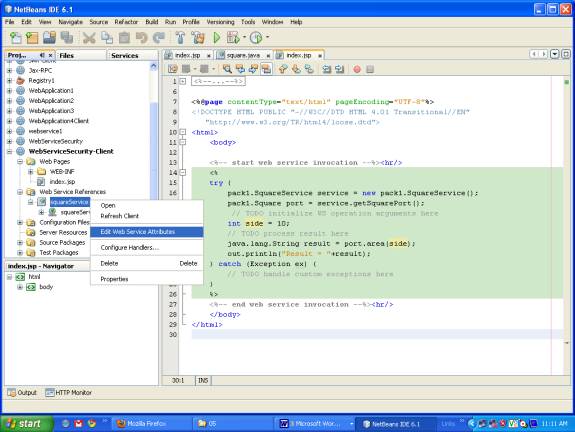
Figure. 27
- In the opened dialog box select the Quality Of Service
- Check the Use development defaults in security
- Click on OK as shown in Figure 28.
 2
2
Figure. 28
Running Client Web service >- Deploy the WebServiceSecurity-Client project
- Right Click in the index.jsp
- Select run index.jsp as shown below in Figure 29.
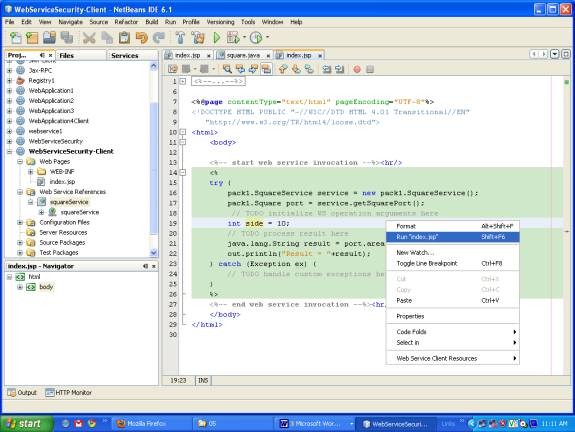
Figure. 29 3
- It deploys the project on the server and run it in the browser
- It executes and give the output as shown below in Fig 30.

Figure. 30