
Spring MVC Hello World Example


Spring MVC Hello World Example in Spring 2.5
In this tutorial we will develop the Spring MVC Example and then run on the Tomcat server.
We are using Spring 2.5 for this tutorial. We will also explain you the process of creating the dynamic web application in Eclipse IDE version 3.5.2. We will use tomcat to run the example. Eclipse provides the way to easily run the example from the IDE.
Step 1:
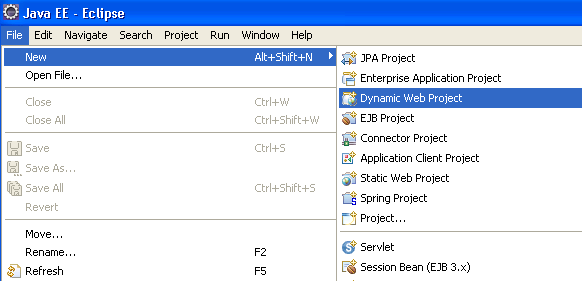
The initial step is to create Dynamic Web Project in eclipse. To create a new Dynamic project in Eclipse IDE select File -> Dynamic Web Project as shown below.
Step 2:
After that New Dynamic Project Window will appear on the screen and you will enter the web application name in the Project name text box. Enter Hello World in the Project Name and then click Next button.
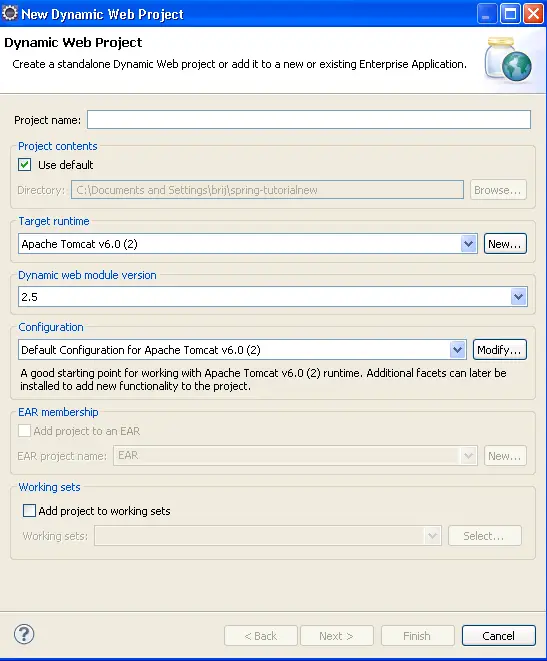
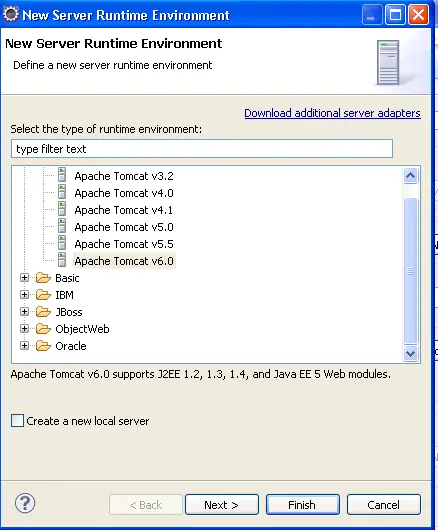
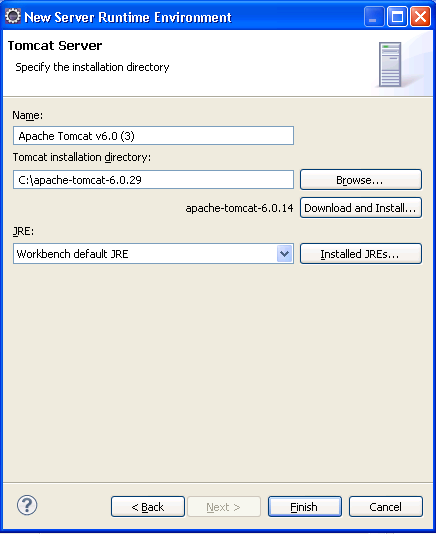
We will enter the project name and set the project location and set the target runtime (Apache Tomcat server) just click on New button after that a New Server Runtime Environment window will appear, select the latest version of runtime environment and click Next button and Download and install the Tomcat Server and click on Finish button and also click on Finish button in Dynamic Web Project creation window.
Step 3:
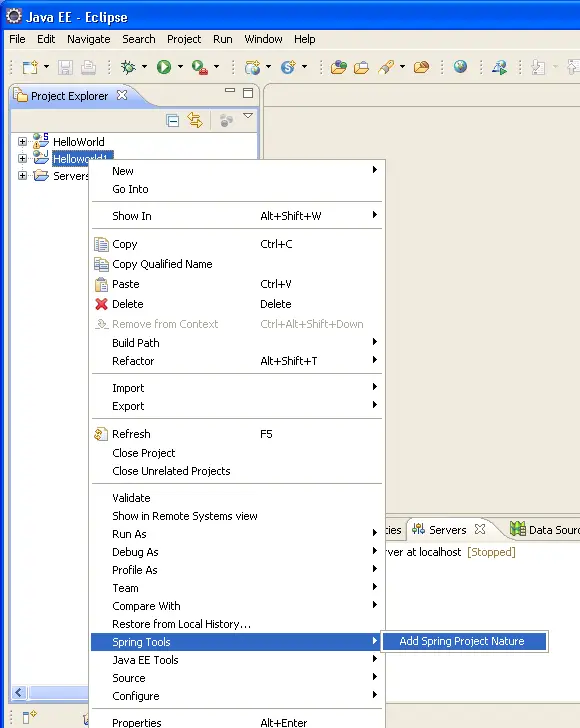
After that we will set the nature of the project just right click on the project and select Spring Tools with Add Spring Project Nature.
Step 4:
We will add all Spring Web MVC 2.5 jar files.
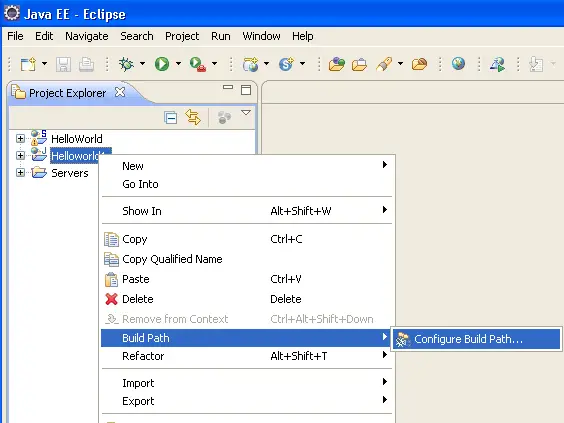
After that Build Path window will appear on the IDE screen look like
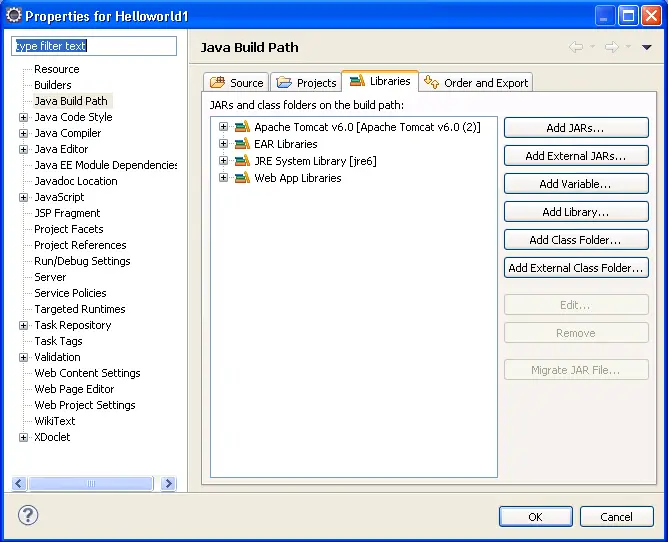
After that we will select the Libraries tab and click on Add External Jars button for add jar files. After selecting all Spring 2.5 Web MVC jar file we will click on Ok button and jar files is appears in your project lib folder.
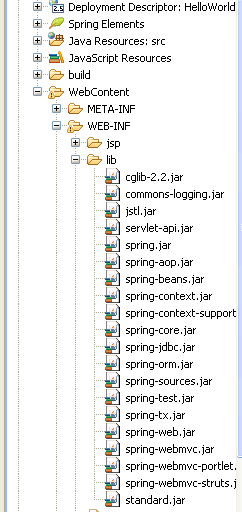
Now your project will created in Eclipse IDE.
Step 5:
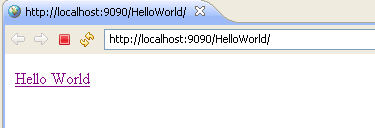
Now we will created a index.jsp in project's WebContent folder. In the jsp file we will create a new hyperlink "Hello World !" that will be linked to hello.html page. The code of index.jsp is:
|
<%@page contentType="text/html" pageEncoding="UTF-8"%> <html> <body> <a href="hello.html">Hello World</a> </body> 0 </html> |
Step 6:
Now we will configure the DispatcherServlet in web.xml file. The DispatcherServlet will be configured to process all the request ending with .html. 1
Here is the code of configuring DispatcherServlet in web.xml file:
<servlet>
<servlet-name>dispatcher</servlet-name>
<servlet-class>org.springframework.web.servlet.DispatcherServlet</servlet-class>
<load-on-startup>1</load-on-startup>
</servlet>
<servlet-mapping>
<servlet-name>dispatcher</servlet-name>
<url-pattern>*.html</url-pattern>
</servlet-mapping>
The full code of web.xml file is: 2
|
<?xml version="1.0" encoding="UTF-8"?> <web-app version="2.5" xmlns="http://java.sun.com/xml/ns/j2ee" 3 xmlns:xsi="http://www.w3.org/2001/XMLSchema-instance" xsi:schemaLocation="http://java.sun.com/xml/ns/j2ee http://java.sun.com/xml/ns/j2ee/web-app_2_5.xsd" > 4 <servlet> <servlet-name>dispatcher</servlet-name> <servlet-class>org.springframework.web.servlet.DispatcherServlet</servlet-class> 5 <load-on-startup>1</load-on-startup> </servlet> <servlet-mapping> 6 <servlet-name>dispatcher</servlet-name> <url-pattern>*.html</url-pattern> </servlet-mapping> 7 <welcome-file-list> <welcome-file>index.jsp</welcome-file> </welcome-file-list> 8 </web-app> |
Step 7:
Now we will create a new xml file called dispatcher-servlet.xml in the WEB-INF folder of the web application. This is the main configuration file for the Spring MVC. Here we will define the ViewResolver, the code for defining the view resolver is as shown below: 9
<bean id="viewResolver" class="org.springframework.web.servlet.view.InternalResourceViewResolver">
<property name="prefix">
<value>/WEB-INF/jsp/</value>
</property>
<property name="suffix">
<value>.jsp</value>
</property>
</bean>
The view resolver looks for the jsp files in the /WEB-INF/jsp/ directory.
The we have to define bean for
org.springframework.web.servlet.handler.SimpleUrlHandlerMapping as
shown below:
<bean id="urlMapping" class="org.springframework.web.servlet.handler.SimpleUrlHandlerMapping">
0
Then we will define the url mapping with the Controller bean as shown below:
<map>
<entry key="/hello.html">
<ref bean="helloController"/>
</entry>
</map>
Finally we will define the Controller bean as shown below: 1
<bean id="helloController" class="net.roseindia.web.HelloWorldController"> </bean>
The full code of dispatcher-servlet.xml file is: 2
|
<?xml version="1.0" encoding="UTF-8"?> <beans xmlns="http://www.springframework.org/schema/beans" 3 xmlns:xsi="http://www.w3.org/2001/XMLSchema-instance" xsi:schemaLocation="http://www.springframework.org/schema/beans
http://www.springframework.org xmlns:p="http://www.springframework.org/schema/p"> 4 <bean id="viewResolver" class="org.springframework.web.servlet.view.InternalResourceViewResolver"> <property name="prefix"> 5 <value>/WEB-INF/jsp/</value> </property> <property name="suffix"> 6 <value>.jsp</value> </property> </bean> 7 <bean id="urlMapping" class="org.springframework.web.servlet.handler.SimpleUrlHandlerMapping"> <property name="interceptors"> 8 <list> <ref local="localeChangeInterceptor"/> </list> 9 </property> <property name="urlMap"> <map> 0 <entry key="/hello.html"> <ref bean="helloController"/> </entry> 1 </map> </property> </bean> 2 <bean id="helloController" class="net.roseindia.web.HelloWorldController"> </bean> <bean
id="localeChangeInterceptor"
class=" <property name="paramName" value="hl"/> 3 </bean> <bean id="localeResolver" class="org.springframework.web.servlet.i18n.SessionLocaleResolver"/> </beans> 4 |
Step 8:
After that we will creates the controller class in the project src folder. This will be used as the controller for the hello.html request. The code of the HelloWorldController.java calss is:
|
After that we will create a hello.jsp in the WEB-INF folder by create a jsp folder. The WEB-INF/jsp/hello.jsp code is: 5
|
<%@ taglib prefix="c" uri="http://java.sun.com/jsp/jstl/core" %> <html> <body> 6 <c:out value="${message}"/> </body> </html> 7 |
Step 9:
To run the example select Run -> Run As -> Run On Server from the menu and then run the application on tomcat server. Eclipse will start Tomcat server and deploy the application on the Tomcat. Ellipse will also open the application in it internal browser as shown below:
 8
8
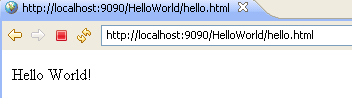
Click on the "Hello World" link to test the application. It should display the "Hello World" message as shown below.
Download code: 9
You can download the code from the above url and then import the project in Eclipse IDE.