
In this tutorial you will learn how to download the Eclipse Helios IDE and how to add the tomcat7 application server in Eclipse
Download Eclipse Helios And Add The Tomcat7 For Java EE6
In this tutorial you will learn how to download the Eclipse Helios IDE and how to add the tomcat7 application server in Eclipse.
You can download the Eclipse Helios IDE for Java EE Application Server from the link given here http://eclipsesource.com/en/downloads/eclipse-helios-download/.
After visiting the above address you have to first find out the heading "Eclipse IDE for Java EE Developers" and then click on this heading like the image is given below :

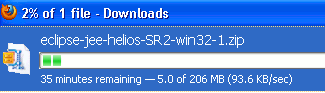
After clicking on the heading your downloading will be started on your computer like as :
After completing the download you will get a zip file you will required to extract this file. You can extract it in any of your drive here, I am extracting in the C:\BipulEclipseHelios. Following figure showing this process :

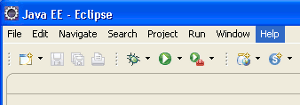
Now you are able to create your application using the Eclipse Helios IDE.
To create an application in Eclipse Helios double click on the icon displays(actually it is an .exe file) in the folder where you have save the eclipse after downloading then specify the work space and click on "OK" button. Following image shows this process :

After clicking on ok button eclipse is started to create the applications. Following image shows this process :

After completed this wizard an editor will be displayed on your window screen where you can start to create your application. Here is not end of your problem related to creating web applications, because to create a web application you will be required to add an application server to deploy your application. Here I am giving the snap shot for adding the Apache Tomcat7 application server to deploy a web application in java jee6.
Download the Tomcat7 from the link http://tomcat.apache.org/download-70.cgi. If you have already downloaded Tomcat7 then ignore this step.
After downloading store it in your specific drive.
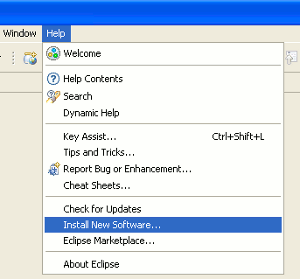
Now the following step is concerned for adding the specification of Tomcat7.
- Go to the Help tab in the menu bar.
- Click on this tab and select the Install New Software from the list.
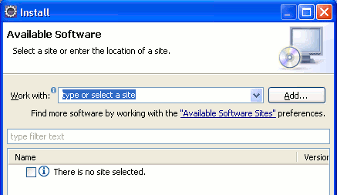
- After clicking on this option a dialog box will open to add new software. Go and click the "Available Software Sites"
- A dialog box will be appeared on your screen, left side of this window you will see a list where you have to select the element "Server" click on "+" sign then a sublist of the server element will be displayed, you have to select the "Runtime Environments". After selection of this element you have to select an "Add" button appeared in the right of this same window.
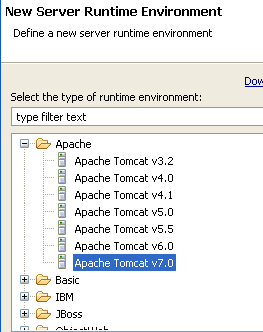
- When you will click on "Add" button a dialog box will be appear to you for selecting your server here you have to select the tomcat7 server.
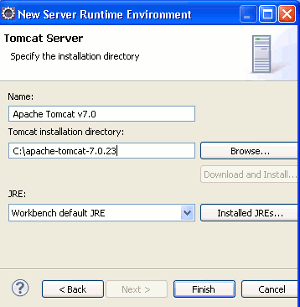
- Click on "Next" you will enter a new step here you have to give the path where you have kept the server after downloading.
- Click on "Finish" you will see that the server is added in the window where you were started to add the server then click on "OK" button to close the window.


Now you are able to create your web application in Eclipse Helios.