
Creating a Project
![]()
![]()
![]()
This section explains the steps involved in developing a project in Eclipse IDE. These steps are:
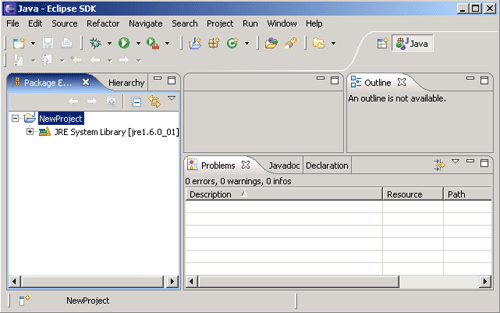
1. Now, go and click to file->new->project icon.Click on ?Java Project? and give a project name of your choice (?NewProject?) and click Finish. This project will appear in the ?Package Explorer? area on the left panel. Some libraries are added automatically in the project. You can check it expanding the view by clicking on the + sign.

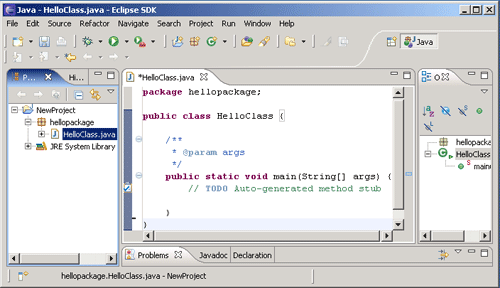
2. Right click on the project name NewProject symbol and click on the new->package. Specify the name of your choice for the package (?hellopackage?) and click Finish. This appears in the ?Package Explorer? area on the left under the project name NewProject.

3. Right click on the package name hellopackageand click on the
new->class. Specify the name of your choice for the class
(?HelloClass?). Unclick Inherited abstract methods, and click
public static void main(String[] args). Click radio button
labeled public
to select modifier for a simple program and click Finish.

4. Now a window opens containing a java program with the main()
method. This program will be according to the information provided before.
5. You can now modify the program according to your requirement.

6. Click Window->Show View->Console. A
console window will open at the bottom. If a Console tab is already there, just
click on it.
7. Eclipse compiles the program as we type. If there is no any red mark in the window of the program, it means program is syntactically correct. Save this file clicking on File->Save or press Ctrl+s in the keyboard. If there is any error then you will see red circle on the left of the window of the program. Click on the Problems tab to see errors. Fix these errors and save the program.

8. Click Run->Run as->Java application. The output will appear in
the Console window below.

