
Video Tutorial - How to create and use Facebook Shared Photo Albums?
Facebook Shared Photo Albums is the feature added to the Facebook. It is very user friendly and comes with amzing feature. In this article we will explain you how to use Facebook Shared Photo Albums?. We have also included a video tutorial explaining the process to learn how to create Facebook Shared Photo Albums.
Have you ever been to a concert, party, get-together, wedding, football game, event, etc. and have ever faced trouble collecting photos of that events from your friends afterwards, then Facebook has the answer for you.
The recently unveiled Facebook Shared Photo Albums can help you add 10,000 photos of an event you have been to. It provides a place where all your friends can add their photos and it gets available for all.
Following is a step-by step description of how you can create and use Facebook Shared Photo Albums:

It was at first difficult to scan through all the photo albums of your friends to find the photos of you with them.
Video Tutorial of Facebook Shared Photo Albums
Facebook has provided a new “Share Photo Album” feature that will help you to group and store picture with your friends in one album. This in a way will help all of your friends have one common set of pictures.
You can create a new album or can share an existing album. If you want to share an existing album, click the “Make Shared Album” button in left corner of the album.
Points to Note:
- Only one person can create an album. He/she is called “Creator”.
- A Creator can add up to 50 “Contributors”.
- Every Contributor can add up to 200 photos.
- A Shared Photo Album can have maximum of 10,000 photos.
- Contributors can Tag, Edit or give Captions to the photos they add.
Here’s how to create and use Facebook Share Photo Album:
Create an album by adding various photos of the event you and your friends have just been part of.

Fill out information about the album and each photo that you are uploading. You can Name the Album and add a small description about it.
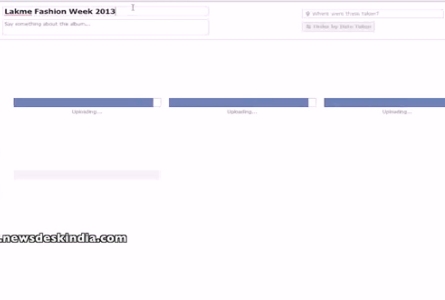
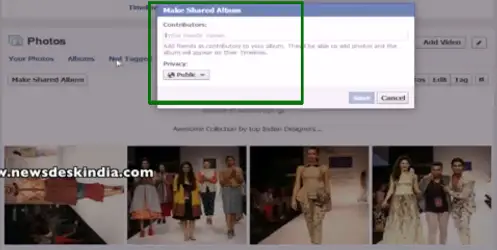
When all the photos have been uploaded a button “Make Shared Album” will appear. Click it.

To add Contributors (your friends who have been to the event) add your friends’ names into the field.
- Here you (Creator) can edit the visibility (who can see the photos and who can't) and Album’s privacy setting by selecting "Public", "Friends of Contributors" or "Contributors only".
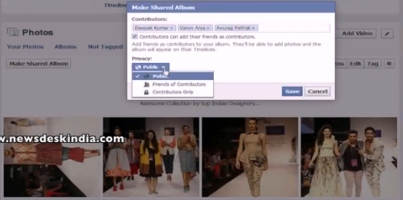
- Creator can also decide whether or not to allow Contributors to invite others to the album. Check or uncheck the box that says “Contributors can add their friends as contributors”.
When you click Save. A notification will be sent to your friends inviting them as contributors. If they accept they can upload their share of photos.

- Your friends or Contributors can view the album, see other Contributors, add photos, Tag, Edit and give Captions to the photos. A creator can also allow or disallow a contributor from adding more contributors.

Settings of Shared Photo Album:
Creator can change Contributor’s privileges anytime he/she want. Just go to the album and click Edit.
One cannot share Profile Pictures, Timeline Photos and Cover Photos.
