Spring 3.0 MVC Form, Spring 3.0 MVC Form Example
In this tutorial we are going to develop Spring 3 MVC form example. This application will help you learn the concept of Spring 3 MVC forms.
In this tutorial we are going to develop Spring 3 MVC form example. This application will help you learn the concept of Spring 3 MVC forms.Spring 3 MVC Form Example
In this tutorial we are going to develop Spring 3 MVC form example. This application will help you learn the concept of Spring 3 MVC forms. After completing this tutorial you will be able to understand the Spring 3 MVC based applications and use the knowledge gained here in developing more complex applications using Spring 3 MVC module.
In this application there are two jsp files. One jsp file for allowing the user to enter User Name and Email and another jsp file to display the same values into another JSP page. We have also developed a controller to process the request and then return the Model and view for rendering the output. The SimpleFormController.java class is developed by us to work as controller here. This is the annoted controller used in the application.
You can download and open the project in Eclipse IDE and then run it in eclipse. You will be needing the tomcat server to run the application from Eclipse.
In this example application uses the following jar files:

Above jar files are included in the example project.
Step 1:
File->New->Press Other->Web->Select Dynamic Web Project and Press Next
Step 2:
Now Enter Project name "Spring3Example" and Press Next . After Press Finish.
Step 3:
Create index.jsp under WebContent-
|
<%@ page language="java" contentType="text/html; charset=ISO-8859-1" pageEncoding="ISO-8859-1"%><! DOCTYPE html PUBLIC "-//W3C//DTD HTML 4.01 Transitional//EN" "http://www.w3.org/TR/html4/loose.dtd">< html> <head> <meta http-equiv="Content-Type" content="text/html; charset=ISO-8859-1"> <title>Spring 3, MVC Examples</title> </head> <body> <h1>Spring 3, MVC Examples</h1> <ul> <li><a href="forms/simpleForm.html">Simple Form</a></li> </ul> </body></ html> |
Step 4:
Now create a form class in src folder . The code of "User.java" is
|
package net.roseindia.form;public class User { private String userName; private String email; public void setUserName(String userName){ this.userName=userName;} public String getUserName(){ return userName;} public void setEmail(String email){ this.email=email;} public String getEmail(){ return email;} } |
Step 5:
Now create Controller class " SimpleFormController.java" under java Resources:src folder. This is the annoted class used as Controller in the application. The code "SimpleFormController.java" is:
|
package net.roseindia.controllers;import net.roseindia.form.User;import org.springframework.stereotype.Controller;import org.springframework.ui.Model;import org.springframework.web.bind.annotation.ModelAttribute;import org.springframework.web.bind.annotation.RequestMapping;import org.springframework.web.bind.annotation.RequestMethod;@Controller public class SimpleFormController { @RequestMapping(value = "/simpleForm.html", method = RequestMethod.GET) public void simpleForm(Model model) {model.addAttribute( new User());} @RequestMapping(value = "/formoutput.html", method = RequestMethod.POST) public void simple(@ModelAttribute User user, Model model) {model.addAttribute( "user", user);} } |
The annotation @Controller makes this class a controller. The @RequestMapping annotation is used to map a business method to the request uri. In the following code snippet /simpleForm.html uri is mapped to the simpleForm(..) method. The method = RequestMethod.GET is for mapping the GET method. Here is full code of simpleForm(..) function mapping:
@RequestMapping(value = "/simpleForm.html", method = RequestMethod.GET) public void simpleForm(Model model) {model.addAttribute(
new User());}
When user clicks on the submit button following method of Contoller is executed:
@RequestMapping(value = "/formoutput.html", method = RequestMethod.POST) public void simple(@ModelAttribute User user, Model model) {model.addAttribute(
"user", user);}
With the help of @RequestMapping annotation you can map request uri to a method in the contoller class and then Spring framework will execute the mapped method.
Step 6:
Now create views folder under WebContent->WEB-INF. After cerate folder views inside cerate "simpleForm.jsp" file root
WebContent/ WEB-INF/views /simpleForm.jsp. The code simpleForm.jsp as :|
<%@ page language="java" contentType="text/html; charset=ISO-8859-1" pageEncoding="ISO-8859-1"%><%@ taglib prefix="form" uri="http://www.springframework.org/tags/form" %><! DOCTYPE html PUBLIC "-//W3C//DTD HTML 4.01 Transitional//EN" "http://www.w3.org/TR/html4/loose.dtd">< html>< head>< meta http-equiv="Content-Type" content="text/html; charset=ISO-8859-1">< title>Insert title here</title></ head>< body> <form:form action="formoutput.html" commandName="user" > <table align="center" > <tr> <td>User Name :</td> <td><form:input path="userName" /></td> </tr> <tr> <td>Email :</td> <td><form:input path="email" /></td> </tr> <tr> <td></td> <td><input type="submit" value="Submit" /></td> </tr> </table> </form:form></ body></ html> |
Step 7:
Now create "formoutput.jsp" under WebContent/ WEB-INF/views /formoutput.jsp. The code "formoutput.jsp" is
|
<%@ page language="java" contentType="text/html; charset=ISO-8859-1" pageEncoding="ISO-8859-1"%><%@ taglib prefix="core" uri="http://java.sun.com/jsp/jstl/core" %><! DOCTYPE html PUBLIC "-//W3C//DTD HTML 4.01 Transitional//EN" "http://www.w3.org/TR/html4/loose.dtd">< html>< head>< meta http-equiv="Content-Type" content="text/html; charset=ISO-8859-1">< title>Insert title here</title></ head>< body> <table align="center" > <tr> <td>Welcome:</td> <td><core:out value="${user.userName}" /></td> </tr> <tr> <td>Your Email:</td> <td><core:out value="${user.email}" /></td> </tr> </table></ body></ html> |
Step 7:
Again modify web.xml file as:
|
<? xml version="1.0" encoding="UTF-8"?>< web-app version="2.5" xmlns="http://java.sun.com/xml/ns/j2ee" xmlns:xsi="http://www.w3.org/2001/XMLSchema-instance" xsi:schemaLocation="http://java.sun.com/xml/ns/j2ee http://java.sun.com/xml/ns/j2ee/web-app_2_5.xsd"> <display-name>Spring3Example</display-name> <servlet> <servlet-name>dispatcher</servlet-name> <servlet-class>org.springframework.web.servlet.DispatcherServlet</servlet-class> <load-on-startup>1</load-on-startup> </servlet> <servlet-mapping> <servlet-name>dispatcher</servlet-name> <url-pattern>/forms/*</url-pattern> </servlet-mapping> <welcome-file-list> <welcome-file>index.jsp</welcome-file> </welcome-file-list></ web-app> |
web.xml get configure for spring framework .
Step 8:
Now create "dispatcher-servlet.xml" that use viewResolver configuration . The code dispatcher-servlet.xml is:
|
<? xml version="1.0" encoding="UTF-8"?>< beans xmlns="http://www.springframework.org/schema/beans" xmlns:xsi="http://www.w3.org/2001/XMLSchema-instance" xmlns:p="http://www.springframework.org/schema/p" xmlns:context="http://www.springframework.org/schema/context" xmlns:mvc="http://www.springframework.org/schema/mvc" xsi:schemaLocation="http://www.springframework.org/schema/beans http://www.springframework.org/schema/beans/spring-beans-3.0.xsd http://www.springframework.org/schema/context http://www.springframework.org/schema/context/spring-context-3.0.xsd http://www.springframework.org/schema/mvchttp://www.springframework.org/schema/mvc/spring-mvc-3.0.xsd " > <context:component-scan base-package="net.roseindia.controllers"/> <bean id="viewResolver" class="org.springframework.web.servlet.view.InternalResourceViewResolver"> <property name="prefix"> <value>/WEB-INF/views/</value> </property> <property name="suffix"> <value>.jsp</value> </property> </bean></ beans> |
Step 9:
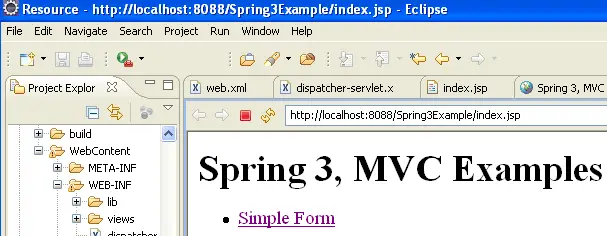
Now will be run application and see the output as
Step 10:
Again click "Simple Form" hyperlink display as simpleForm :

Enter User Name "UserName " and Email " [email protected]" and press Submit . display output as

In this example we created a simple form based application using Spring 3 MVC module of Spring framework.
Download Code
Download the code of the application discussed here from the following url.