Spring 3 MVC and Hibernate 3 Example Part 1
This tutorial explains how to use annotations with spring 3 MVC and hibernate 3 based application to make the development easier and faster than ever before.
This tutorial explains how to use annotations with spring 3 MVC and hibernate 3 based application to make the development easier and faster than ever before.Spring 3 MVC and Hibernate 3 Example application using Annotations
This tutorial explains how to use annotations with spring 3 MVC and hibernate 3 based application to make the development easier and faster than ever before. You can download also the application (Including all jar files required), we are going to explain.
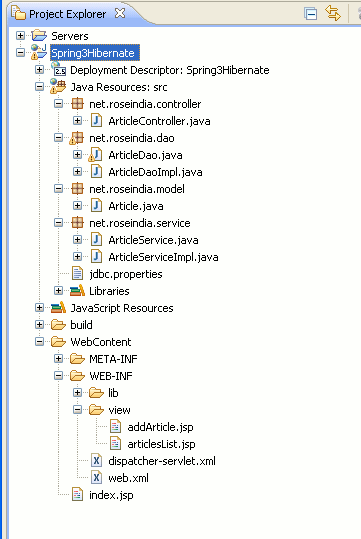
The application directory structure should look like as below, if you are developing the application in Eclipse.
Project Structure:
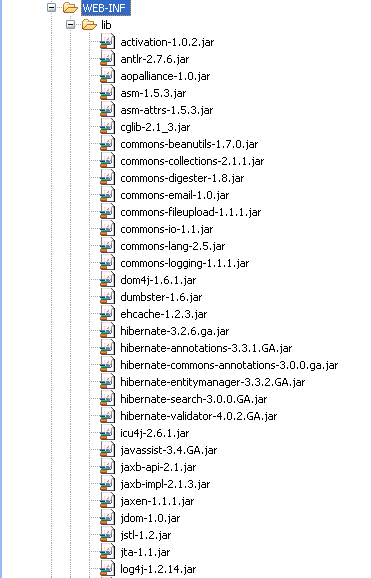
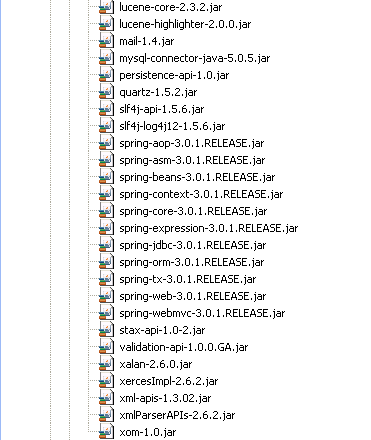
Jar files Required:
Here is the list of jar files required for the application.(Jar files are included with the application download.)
web.xml:
You must be aware of how spring is configured in web.xml. Here is the web.xml we configured for our application. All html requests are processed via spring.
|
<? xml version="1.0" encoding="UTF-8"?><web-app version="2.5" xmlns="http://java.sun.com/xml/ns/javaee" xmlns:xsi="http://www.w3.org/2001/XMLSchema-instance" xsi:schemaLocation="http://java.sun.com/xml/ns/javaee http://java.sun.com/xml/ns/javaee/web-app_2_5.xsd"> <servlet> </ web-app> |