WYSIWYG html editor in JSP
This tutorial explains how to create toolbar with textarea in jsp. This example is created in eclipse IDE and run on tomcat server.
This tutorial explains how to create toolbar with textarea in jsp. This example is created in eclipse IDE and run on tomcat server.WYSIWYG html editor in JSP
This tutorial explains how to create WYSIWYG html editor in JSP. This example is created in eclipse IDE and run on tomcat server.
We will use jQuery and jquery.wysiwyg for creating WYSIWYG html editor in JSP.
This tutorial applies following steps.
Step 1 :
First we create Dynamic web project "toolbar" in eclipse IDE . Now we create toolbar.jsp file under WebContent folder. The code of toolbar.jsp are given as:
|
<%@ page language="java" contentType="text/html; charset=ISO-8859-1" pageEncoding="ISO-8859-1"%> <!DOCTYPE html PUBLIC "-//W3C//DTD HTML 4.01 Transitional//EN" "http://www.w3.org/TR/html4/loose.dtd"> <head> <title>Toolbar with TextArea </title> <meta http-equiv="Content-Type" content="text/html; charset=UTF-8" /> <link rel="stylesheet" href="css/jquery.wysiwyg.css" type="text/css" /> <link rel="stylesheet" href="examples.css" type="text/css" /> <script type="text/javascript" src="jquery/jquery-1.3.2.js"></script> <script type="text/javascript" src="jquery/jquery.wysiwyg.js"></script> <script type="text/javascript"> $(function() { $('#wysiwyg').wysiwyg(); }); </script> </head> <body> <h1>Toolbar with TextArea </h1> <div> <textarea name="wysiwyg" id="wysiwyg" rows="5" cols="47"></textarea> </div> </body> </html> |
This example uses jquery and css file that is described in the above jsp file.
Step 2 :
Again create css folder under "WebContent" folder and put inside "jquery.wysiwyg.css" file.
Step 3 :
Now create images folder under "WebContent" folder and put inside "toolbarimage.gif" image.
Step 4 :
Now create jquery folder under "WebContent" folder and put inside "jquery-1.3.2.js" and "jquery.wysiwyg.js" jquery files.
Step 5 :
Now open "web.xml" file and modify as:
|
<?xml version="1.0" encoding="UTF-8"?> <web-app xmlns:xsi="http://www.w3.org/2001/XMLSchema-instance" xmlns="http://java.sun.com/xml/ns/javaee" xmlns:web="http://java.sun.com/xml/ns/javaee/web-app_2_5.xsd" xsi:schemaLocation="http://java.sun.com/xml/ns/javaee http://java.sun.com/xml/ns/javaee/web-app_2_5.xsd" id="WebApp_ID" version="2.5"> <display-name>toolbar</display-name> <welcome-file-list> <welcome-file>toolbar.jsp</welcome-file> </welcome-file-list> </web-app> |
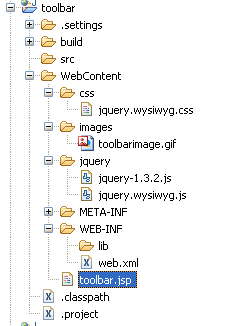
The project structure displays as:
Step 6 :
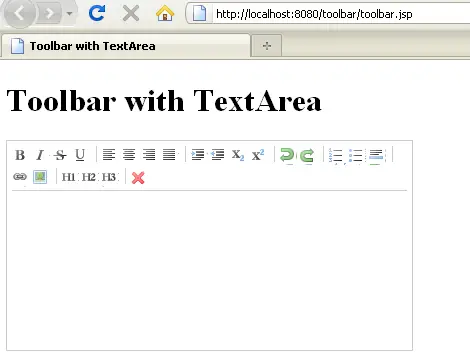
When run application on tomcat server, it displays output as:
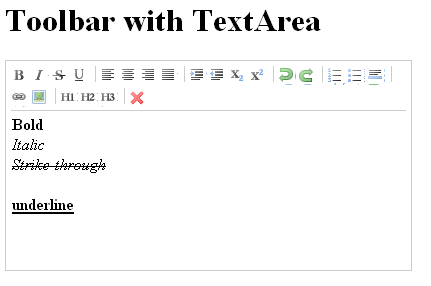
You can select different button and modify different text format as given below:
Again you select different heading format as:

Similarly, you can also select another toolbar button as Undo, Redo, and text aligns.
Download Code